

A Life on the Line – Detective Case #12
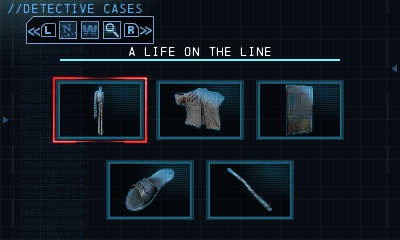 A Life on the Line is the twelfth of fourteen Detective Cases. This case contains five items to find.
- NooseCell Blocks: When you reach the hallway with the large crates, enter the vent, then walk a little to the left before entering another vent. Once on the other side of the crates, run all the way to the right. Scan the floor to find the noose.
- Guards UniformCell Blocks: As soon as you grapple across the room, climb up from hanging and walk to the left. Jump, then grapple to the next ledge when you get close enough. Drop to the lower platform to find the piece of evidence.
- Damaged DoorCell Blocks: In the main cell blocks area, grapple up to the highest floor after taking out the metal with your Batclaw. The damaged door can be found right before the entrance to the next room.
- Prisoner’s SlipperCell Blocks: Once you drop down the hole you made with the heavy beam, scan the area to find the Prisoner’s slipper.
- Cut PipeCell Blocks: In the area before the giant open area with all the different walkways, stop before you drop down the two story hole. Blast through the weak spot in the ceiling and find the pipe in the room above.
Дополнительные миссии. Место преступления
Ловушка на вышке в Ковентри
(выполняется по сюжету)
Убийства в Лэйси Тауэрс
(выполняется по сюжету)
Падение в Джезебл плаза
В квартале Бауэри в северо-восточной части видим небольшую разбитую часть стеклянного потолка, а внизу на земле лежит мёртвый человек. Начинаем осматривать место преступления. 1. Осматриваем труп. 2. Просчитываем траекторию падения тела. 3. Забираемся наверх, сканируем разрушенные перила на верхнем этаже. 4. Спускаемся чуть ниже, сканируем чемоданчик, лежащий на трубе вентиляции. По отпечаткам узнаём подозреваемого.
Находим подозреваемого в Округе Даймонд. Убиваем бандитов вокруг, допрашиваем подозреваемого. Преступление раскрыто.
Крушение вертолёта
(выполняется в миссиях с Дедшотом)
Стрельба в доке Диксона
На крыше дома находим тело, прикрытое плёнкой. 1. Сканируем тело. 2. Создаём хронологию движения. 3. Вычисляем траекторию после выстрела. 4. Находим фотоаппарат за углом стеклянной части крыши. Узнаём информацию о человеке на фотографиях.
Подозреваемого находим на крыше в округе Даймонд.
Пожар в Ковентри
В Ковентри на северо-западе района на улице находим накрытый труп. 1. Сканируем тело. 2. Пятно крови рядом. 3. След от пожара. 4. Воспроизводим хронологию убийства, забираемся на второй этаж, находим отпечаток ноги на стенке. 5. Просчитываем путь отступления подозреваемого, сканируем кусок лестницы на полу. Подозреваемый – Цинь Лю. Находим его на корабле Пингвина на верхней палубе, и задерживаем.
Дорожное происшествие в Бернли
В районе Бернли прямо перед входом в полицейский участок находим тело спецназовца. 1. Сканируем тело. 2. Сканируем пятно крови слева. 3. Идём дальше по траектории полёта, сканируем ещё одно пятно. 4. Воспроизводим хронологию убийства, видим, куда свернула машина. На повороте у стены находим образец краски машины, по этой информации узнаём подозреваемого. Находим спецназовца на крыше ближайшего правого дома. Дело раскрыто.
Избиение в парке аттракционов
На севере района на втором этаже находим мертвое тело. 1. Сканируем тело. 2. Сканируем пятно крови. 3. Проматываем вперёд хронологию преступления. Спрыгиваем на первый этаж, находим орудие убийства – кондиционер, а так же отпечатки пальцев. Подозреваемого находим в центре Парковой улицы, связываем его.
Стрельба в Преступной аллее
На востоке Парковой улицы в переулке перед электростанцией находим два тела. Преступление напоминает случай, который случился с маленьким Брюсом: оба человека мертвы, но ничего не украдено. 1. Сканируем одно тело. 2. Потом второе. 3. По пятнам крови восстанавливаем хронологию убийства. 4. Просматриваем хронологию, видим, как одна из гильз закатилась за решетку вентиляции. Снимем решетку, сканируем гильзу. По ней вычисляем убийцу. На юге промышленного района находим убийцу и задерживаем его.
| + Добавить комментарий |
Доберитесь до укрытия шляпника. Обезвредьте банду, прогуливающуюся рядом с дверью. Через вентиляцию проберитесь в помещение к Безумному шляпнику. Уничтожьте банду шляпника и допросите Джервиса.
После попадания в страну чудес следуйте по дороге. Опасайтесь электрических лампочек в воде. Уничтожьте с помощью бэтарангов 6 лампочек по бокам от замка. Спустится мостик. Далее по стенам доберитесь до небольшой комнатки с тремя дверьми. Чтобы пройти дальше, нужно входить трижды в те двери, над которыми находится изображение человека в кроличьей маске. Выйдя из комнаты, вам придется сразиться с бандитами шляпника. После того, как рухнет зеркальная стена, пройдите к двери.
Далее вам нужно пройти по уровню до сплошной стены. Разрушьте ее взрывчатым гелем. Пересеките кисельную реку на тарелочке, используя бэткоготь. По стене доберитесь до самого верха и прокатитесь на тросе до карточного моста. Будьте осторожны, карты начнут рушиться под вами.
В комнате с механизмами создайте трос на первом уровне и спуститесь чуть ниже, чтобы выключить оборудование. Поднимитесь еще выше и откройте дверь. Дважды перепрыгните маятник, найдите дверь во вторую комнату с механизмами. Дождитесь, пока вращающийся механизм наверху покажет вход, и на тросе поднимитесь. Далее вам нужно по трубам добраться до лестницы. Вы попадете в комнату, откуда начали свой пусть. Шляпник будет угрожать похищенной ножом. Бросьте обратный бэтаранг, чтобы обезвредить Шляпника, после чего добейте решающим ударом. Миссия пройдена.
New 52 Batsuit
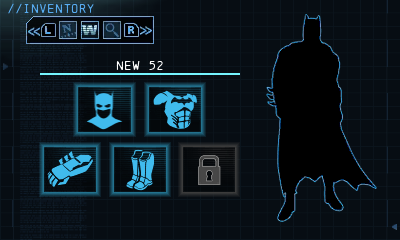 Batman’s costume from the New 52 Universe. (No images yet)
There are five pieces to collect:
-
CowlAdministration
Head to the hallway with the torn down wall that leads to an outside area. Go through, then use the Line Launcher to cross the gap. The crate with the item will be on the other side. -
ChestCell Blocks
In the area where you burst two pipes to take out two thugs, climb up to the walkway and open the vent on the right. Enter to find a crate in another room. -
GlovesCell Blocks
After defeating the thugs, head to the left and analyze the wall to find a weak spot. Blast through with an explosive and find the item on the other side. -
BootsIndustrial
Enter the secret entrance area and head for the area with the long vertical room up above. Use the Tightrope to access a ledge you can grapple to. The crate will be up here. -
Belt
This part is given to you by Catwoman when you find the last hostage. You can only get this part if you defeated The Penguin last.
No Laughing Matter – Detective Case #7
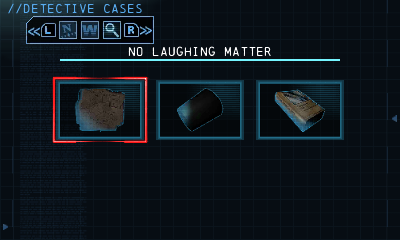 No Laughing Matter is the seventh of fourteen Detective Cases. This case contains three items to find.


- Blackgate MapAdministration: In the main area with the destroyed staircase, scan the chair on the left of the room to find the map.
- Cylindar CapAdministration: Pass throught the library and into the vent. In the next room just above the thugs is a closed vent. Use your Batclaw to break through, then crawl into the next room to find the Cylinder cap.
- Ventilation ManualAdministration: In one of the hallways is a torn down wall that leads to an outside area. Scan the debris on the left to find the manual.
Issues unresolved
Logitech controllers not working
- Users reporting issues with Logitech control mapping and control inversion. Editing config files has no effect.
- For the F310, F510 and F710 set the hardware switch to X and reconnect the controller.
No Gotham Pioneer Bridge CIP
- A glitch will cause the CIP (Crime In Progress) meant for the Gotham Pioneer Bridge to not spawn. Making the «Gotham Protector» achievement impossible to get without finishing the game and starting a new game+. There are two possible workarounds.
- Trigger the CIP for Sheldon Park and lure the final enemy to the southeast corner of the district. Finishing the CIP there will count as an encounter on the bridge.
- If you are lucky the CIP meant for the Gotham Pioneer Bridge will actually spawn in another district at random. Finishing it will count as if it actually was on it.
Ozzy Fatal Error
- The game may constantly crash at certain moments (like when trying to just run the game or select the character Bruce Wayne for Challenge Mode) with the following message:
Fatal Error!

Ozzy_ 364844 2014-03-07_09.25.15 (Wwise: 2012.2.1#4427) Game

Address = 0x75e93442 (filename not found)
Address = 0x7bcc872d (filename not found_
Address = 0x469fe9 (filename not found)
Power Play – Detective Case #13
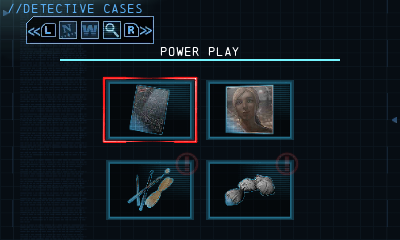 Power Play is the thirteenth of fourteen Detective Cases. This case contains four items to find.
- Tablet ComputerIndustrial: In the garage at the very start of the zone, use the Batclaw to bring down a grate from a vent. Grapple up and crawl through. Scan when you notice a square on the wall.
- PhotoIndustrial: Instead of jumping over the gap right before the exit, drop down to the lower floor. Break down the gate on the left, then enter the vent on the other side. Crawl all the way to the right to access a secret area where you can find the new piece of evidence to the left of a set of computers.
- Dental InstrumentsIndustrial: As you are going through the secret entrance, defeat the thugs after crossing the walkway, then find the Dental tools on a few cabinets on the left.
- Crumbled PapersIndustrial: In the area where you can call two different elevators, grapple up to the top of the one on the left, then use an explosive on the fan on the left. Use a Line Launcher to enter the room behind the fan. Follow the path on the right until you reach the end where the papers can be found.
Игра Batman: Arkham Origins – общая информация
Геймерам предстоит пройти два больших этапа – главная сюжетная кампания и дополнительные миссии. Чтобы прохождение «Бэтмен: Аркхем Оригинс» получило статус «платинового» необходимо выполнить все побочные квесты. Для установки игры компьютер должен соответствовать следующим параметрам:
- ОС: Windows 7/8/10;
- процессор: Intel Core 2 Duo/ AMD Athlon X2;
- видеокарта: GeForce 8800 GTS/ AMD Radeon HD 3850;
- свободное место на жестком диске: 20 Гб.
Продолжение серии игр про Бэтмена
Важно! Разработчики создали игру для нескольких платформ: Xbox, PS 3. Выпущено эксклюзивное издание с DLC и дополнительными бонусами
В Batman: Arkham Origins прохождение основной кампании занимает 12 часов, а с учетом дополнительных квестов понадобится более 40 часов.
One Million Batsuit

Batman’s One Million Batsuit. (No images yet)
There are five pieces to collect:
-
CowlAdministration
Once you enter back into the main hall from the left entrance on the second floor, use the Line Launcher to zip line to the other side. Here you will find the item in a crate. -
ChestAdministration
Exit the The Joker clown game room and ride the elevator. Ride it up and return to the clown room by going through the hatch once again. Drop down the elevator shaft to find the crate. -
GlovesIndustrial
In the area where you freed the hostage, scan the entrance area to find a generator that can be hit with a Shock Batarang. Enter the now opened vent and cross over the electricity to get to the crate. -
BootsCell Blocks
As soon as you grapple across the room, drop down from hanging and you’ll land on a lower platform. There is a small crate with the item inside in the corner. -
Belt
This part is given to you by Catwoman when you find the last junction box. You can only get this part if you defeated Black Mask last.
Проблемные боссы, стратегия борьбы с ними
У новичков могут возникнуть проблемы с боссами. Для победы над каждым нужна особая тактика борьбы.
Крок-убийца
Тактика боя проста – оглушение плащом и постоянные атаки. Нужно стараться избегать захватов. Если Крок захватывает бак, который можно взорвать, необходимо использовать метательное оружие.
Бейн
Противостояние с ним проходит в две стадии. Сначала Бэтмену придется уворачиваться от его атак и применять оглушение три раза подряд. Сложности добавят простые солдаты. На следующей стадии тактика та же самая, только сила Бейна возрастает и он становится неудержимее.
Светлячок
Сражаться с ним придется также в два этапа. Брюс должен спустить его при помощи клеевых гранат и бэтарангов. Притянуть Светлячка получится когтем, а после следует приблизиться к нему, чтобы драться в воздухе.
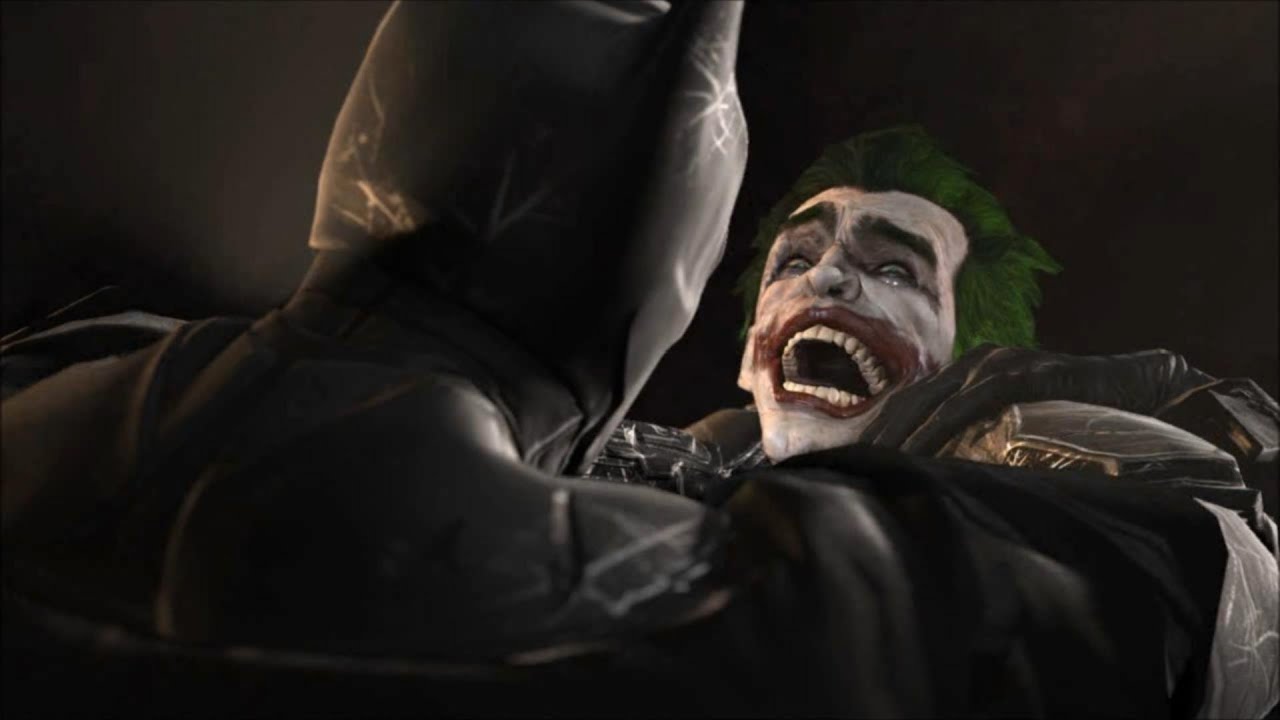
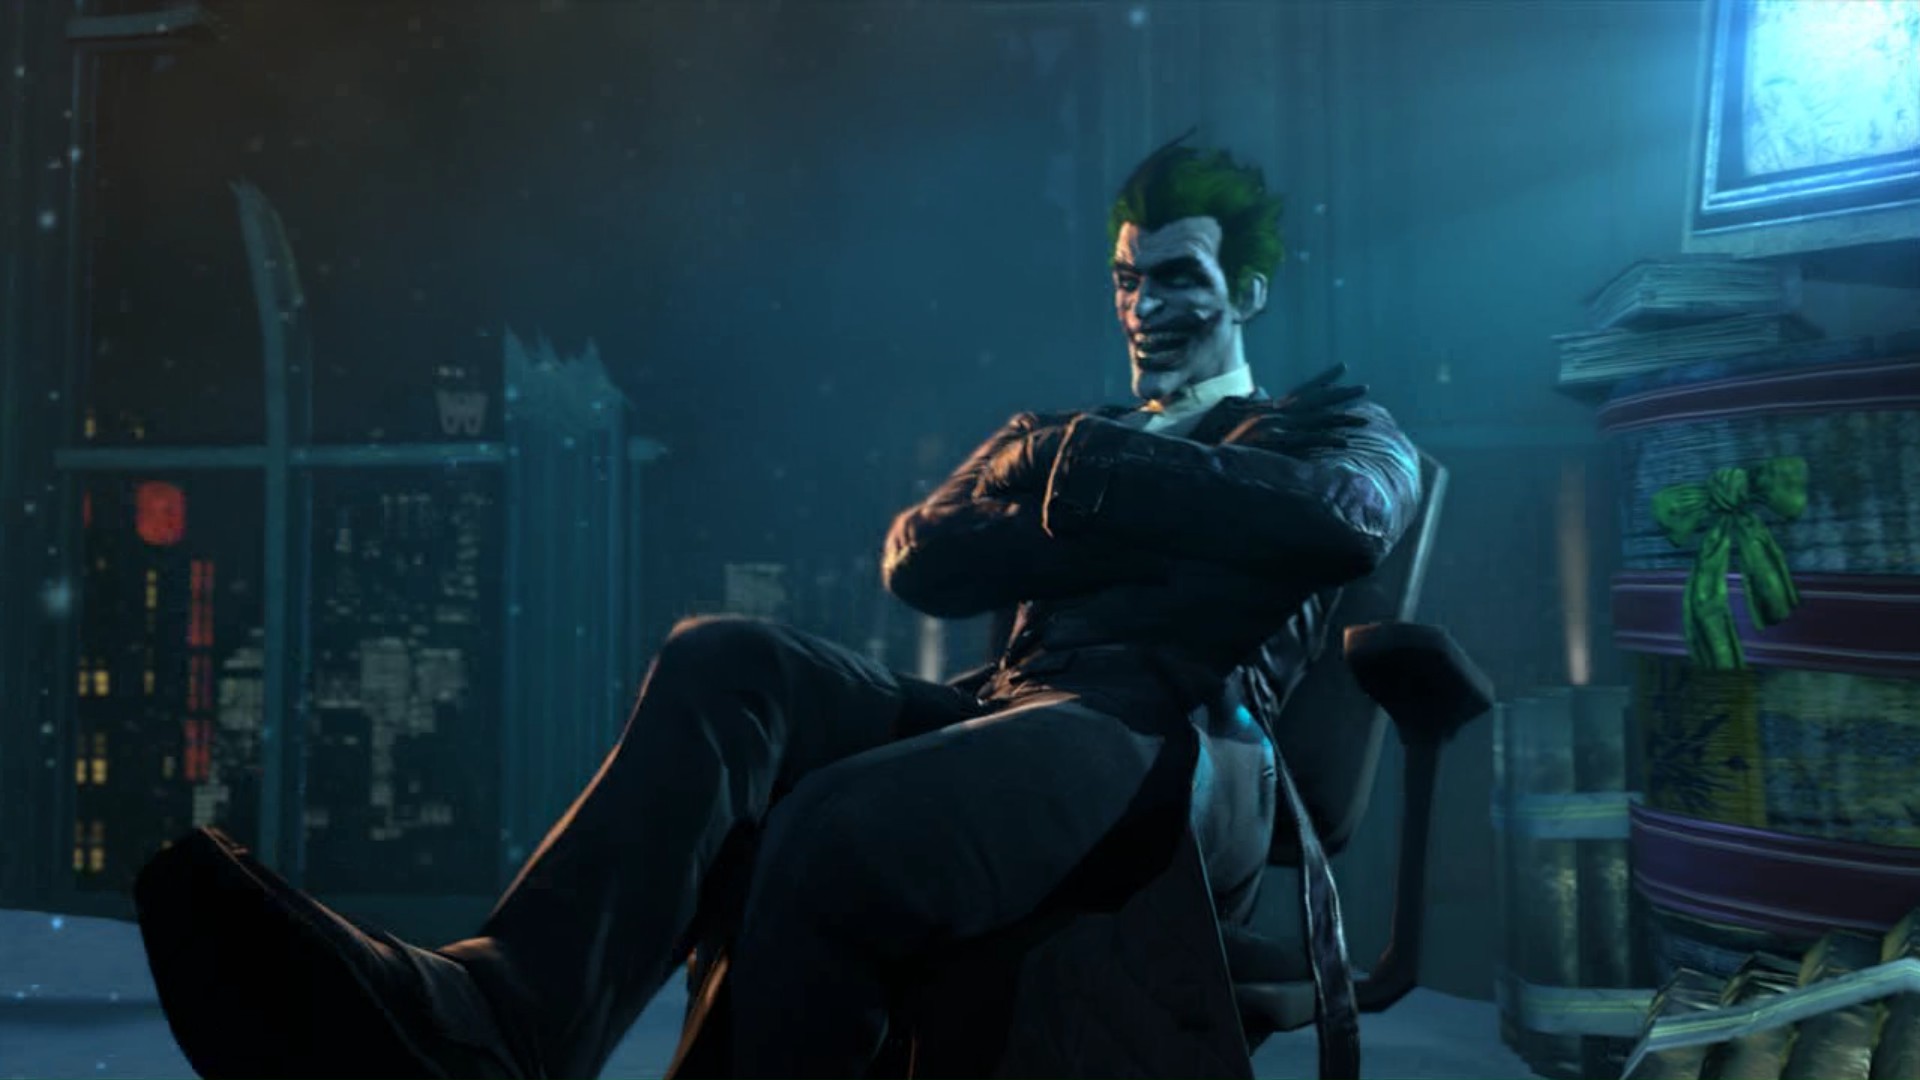
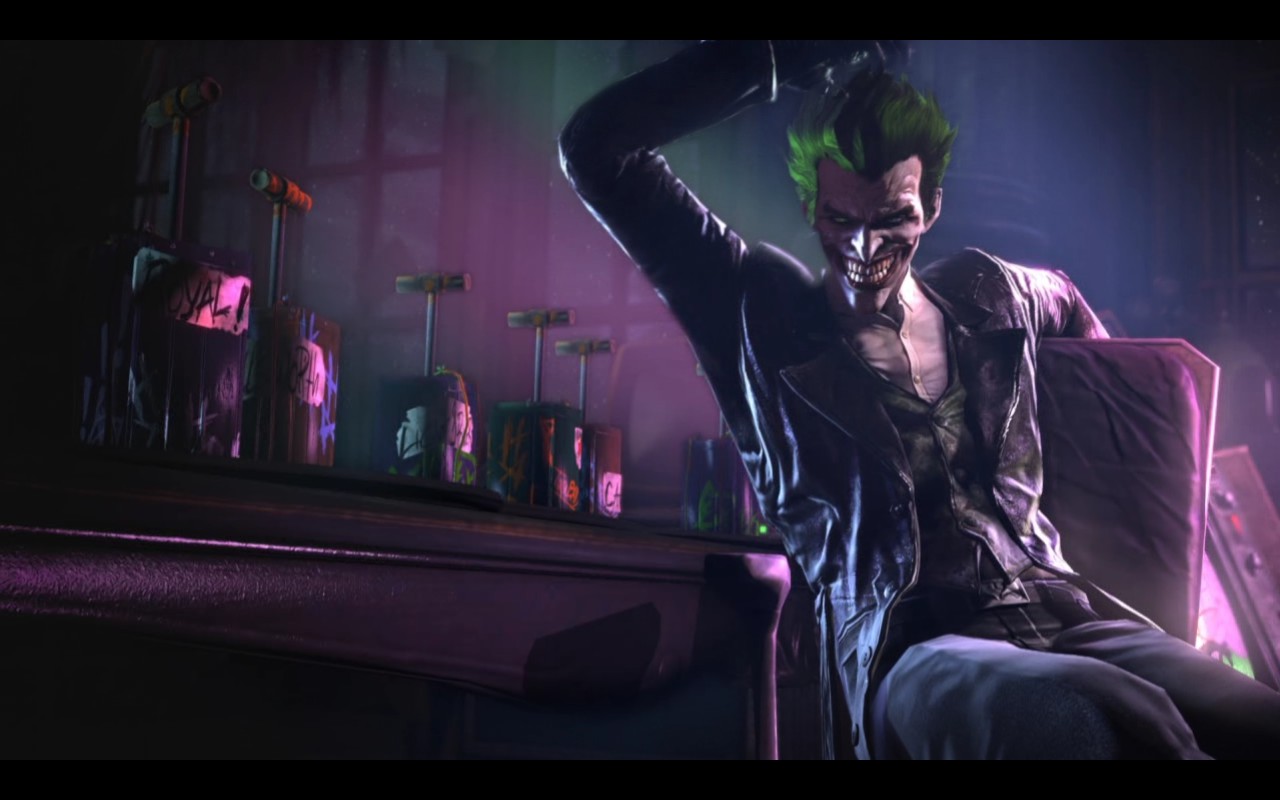
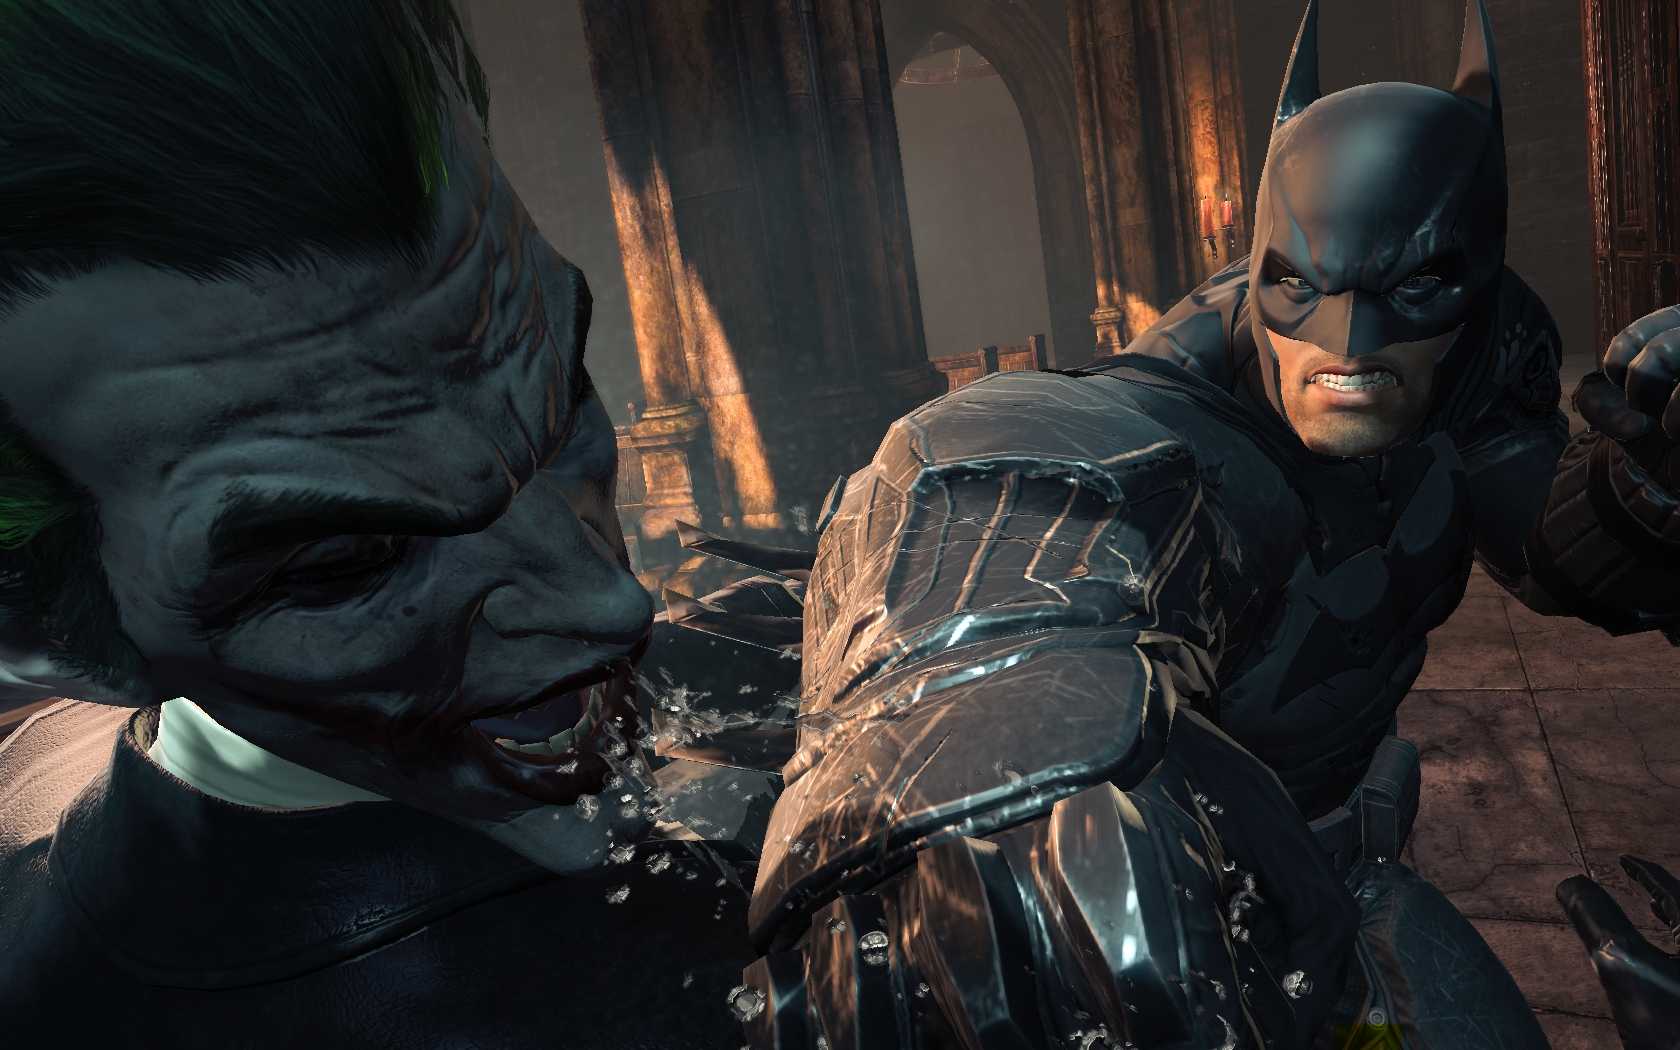
Бэтмен и Джокер – вечные противники
Джокер
В отличие от предыдущих боссов, Джокер не обладает внушительной силой. Поэтому герой справится с ним при помощи кулаков.
Убежище Пугала
В Индустриальном районе Arkham City есть лодка. Если забраться на борт и использовать дешифратор, то можно взломать пароль с самой высокой степенью защиты. Пароль звучит как “Чертог страха”. Взломав его в лодке откроется люк в убежище Пугала.
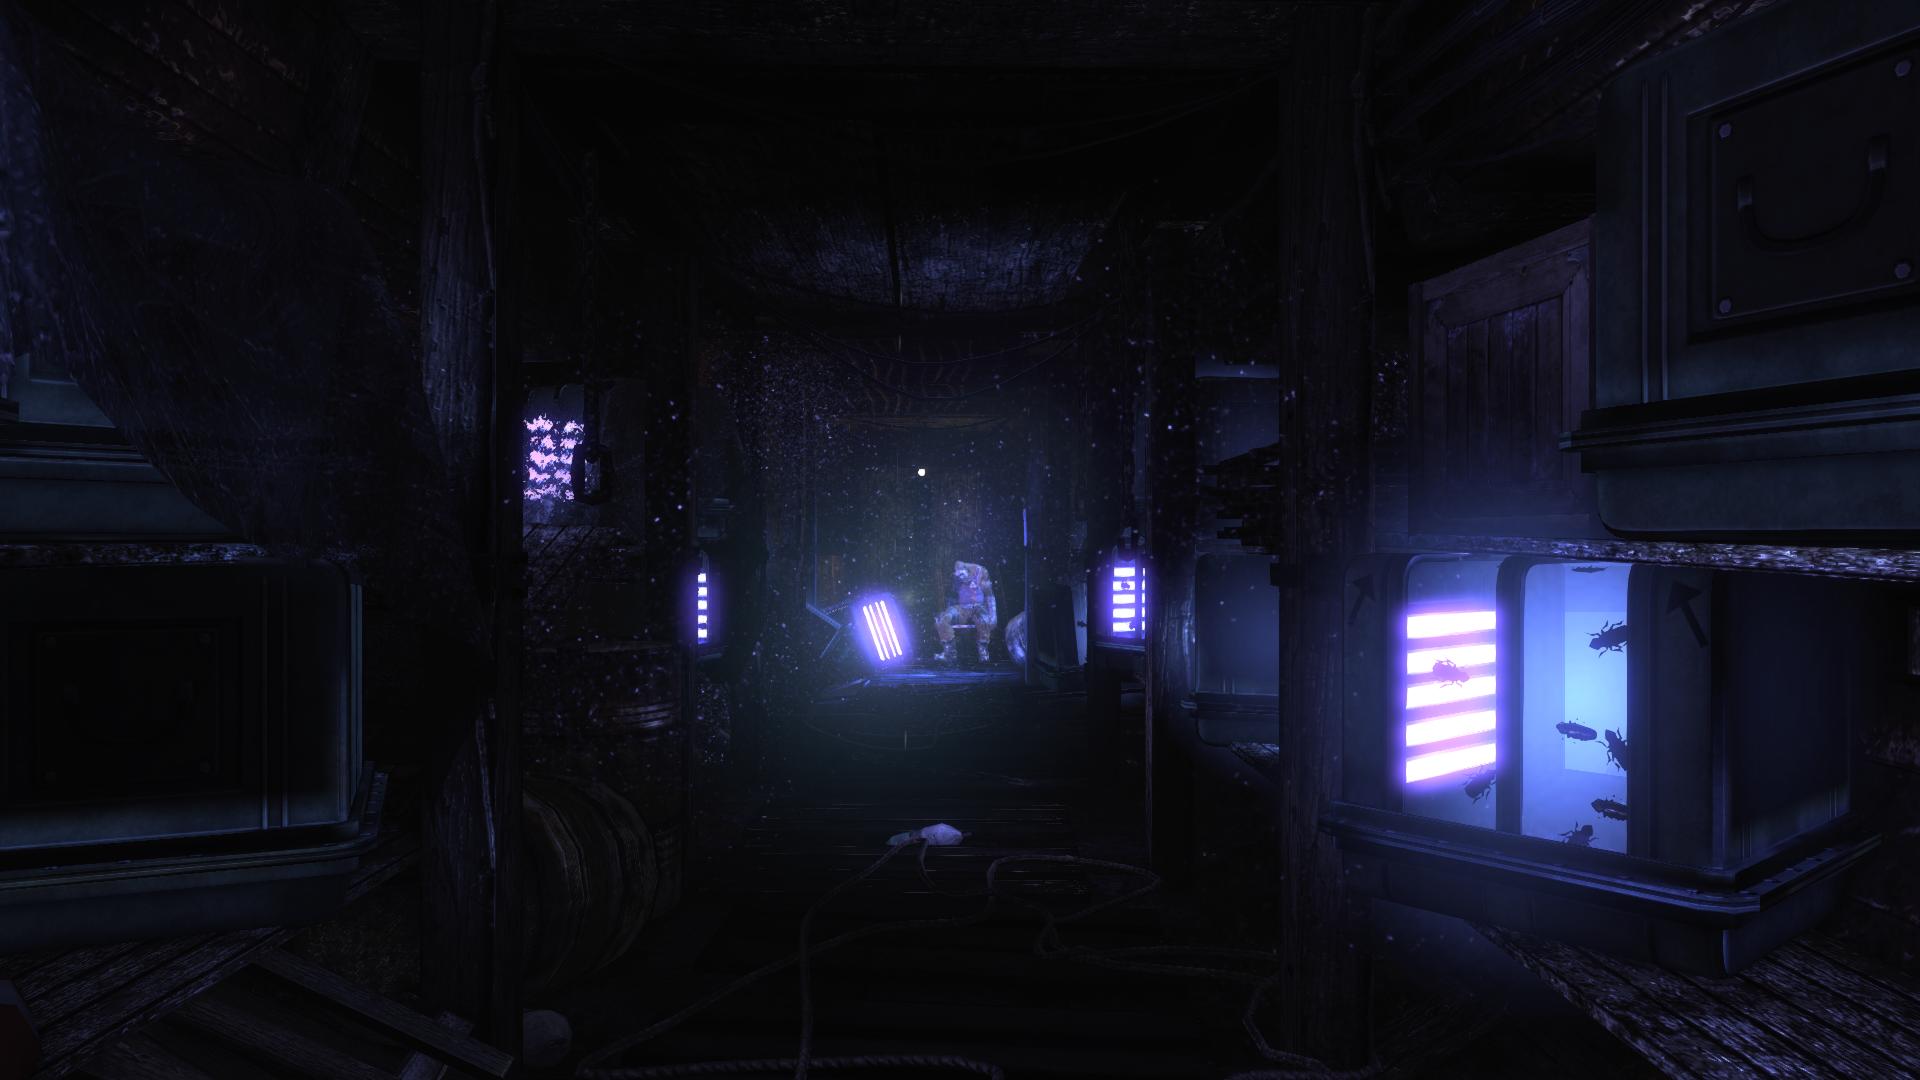
 Внутри находятся ящики с тараканами, которые закупил Пугало, и заключенный, который был использован для эксперимента.
На стене висит таможенная декларация в которой написано следующее: “Таможенная декларация:
Живые насекомые в целях медицинских исследований.
Комментарии:
Джонатан,я надеюсь, что ты останешься доволен, мистер Файн очень настаивал на точном выполнении заказа, так что мы во всём следовали его инструкциям. К этому моменту ты уже должен был получить предыдущие 15 грузов. Оставшиеся уже в пути и скоро к тебе прибудут.”
Мистер Файн, также известный как Брокер, является известным в Готэме поставщиком оборудования для преступников. Именно он помогает им находить убежища.
По всей видимости при помощи Кармина Фальконе и Брокера, Пугало пытается организовать крупный теракт в Готэме, возможно заразив тараканов токсином страха и распространив их по городу.
Каин и Авель – Двойственность человека (Присутствует СПОЙЛЕР!)
В самой первой миссии за Женщину Кошку, в офисе Харви Дэнта, можно увидеть картину с изображением двоих людей и надписью:
“Каин и Авель – Двойственность человека”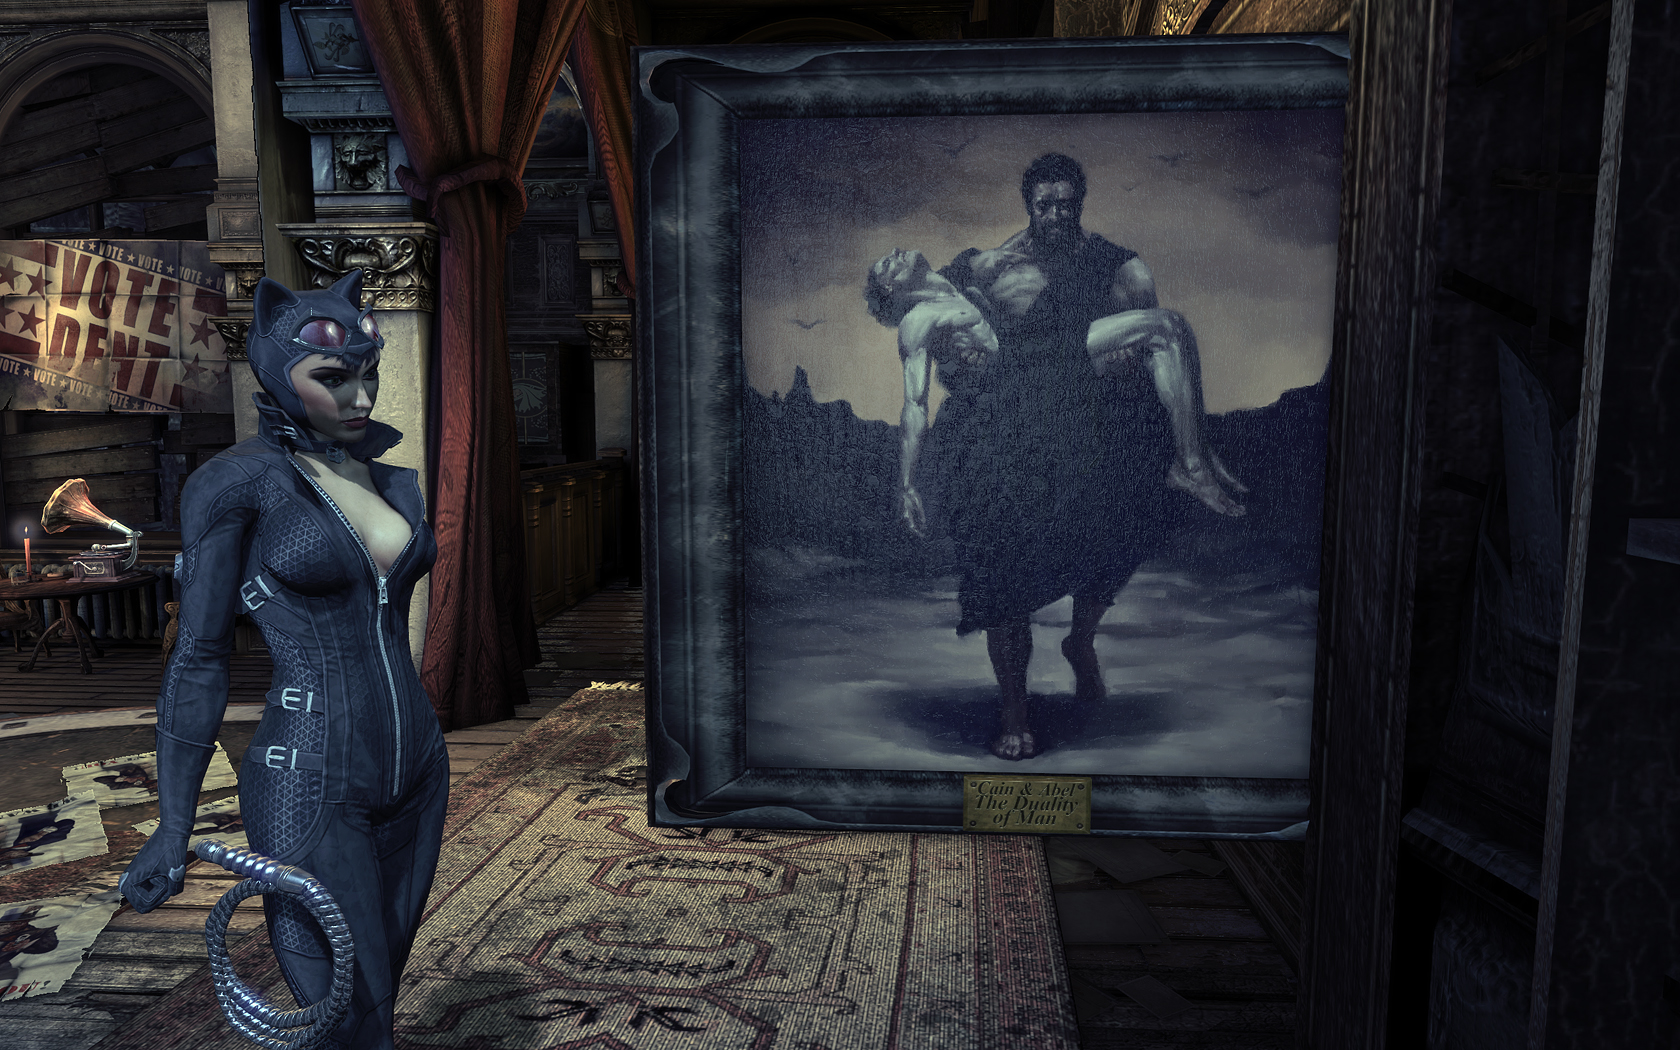 Речь идет о двух библейских персонажах, братьях Каине и Авеле, первых детях Адама и Евы. Авель был скотоводом, а его брат Каин — земледельцем. Оба брата совершили жертвоприношения Богу. Авель принёс в жертву первородных голов своего стада, а Каин — плоды земли. Бог принял только Жертву Авеля. Озлобившись на брата Каин убил Авеля, после чего был подвергнут Божьему проклятию и изгнан.
Картина в игре это двойная ссылка на двойственную личность Двуликого, а также на отношения между Бэтменом и Джокером. В финале игры, Бэтмен несет тело Джокера, также как Каин несет Авеля на картине.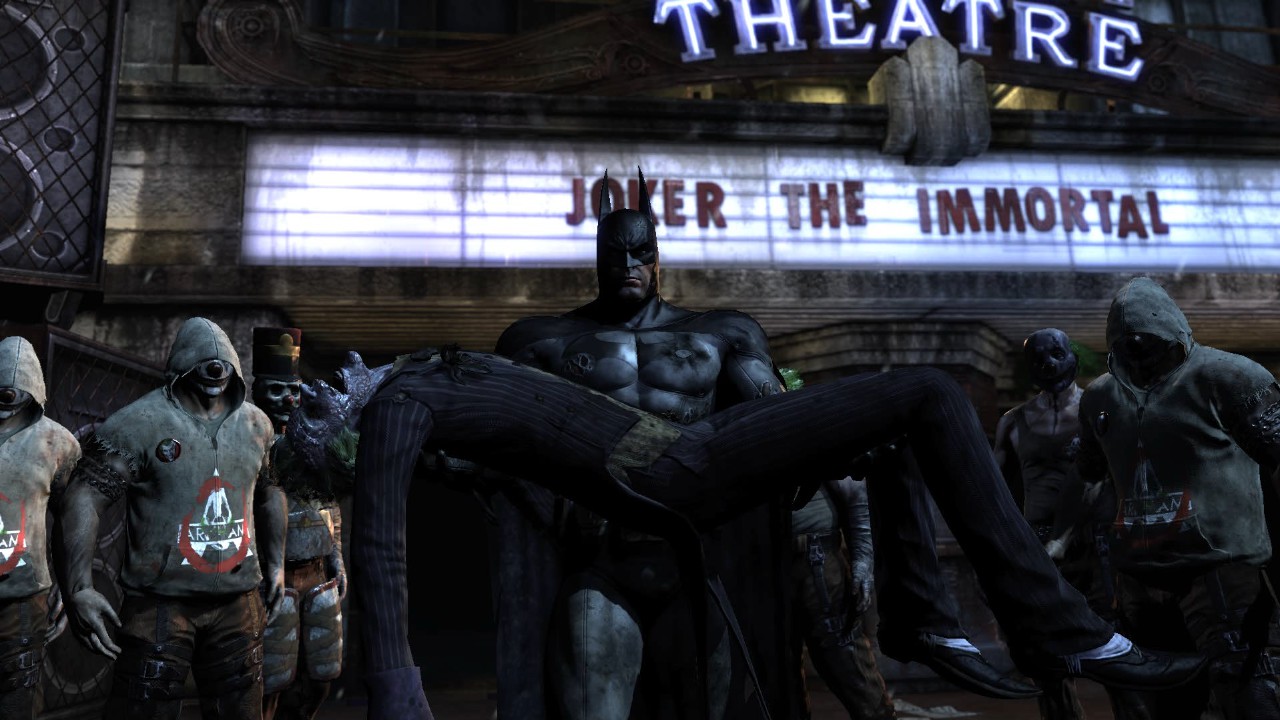
Final Stand – Detective Case #9
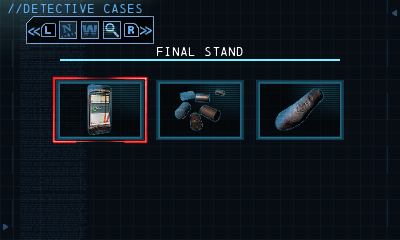 Final Stand is the ninth of fourteen Detective Cases. This case contains three items to find.
- Cell PhoneIndustrial: Return to the area where you fought two thugs under several pressure pipes. There is a weak spot in the ceiling high above. Blast through, then grapple up to find the cell phone in the room above.
- Shell CasingsIndustrial: As you are heading towards the second exit, enter the second to last room and use the Line Launcher to cross over the gap. You can find the shell casings in this small room.
- Severed ThumbIndustrial: Cross the empty gap with a Line Launcher to reach the other side where the thumb can be found. This room can be found in one of the rooms on the bottom of the map.
Дополнительные миссии. Безумный шляпник
Условия появления задания: после прохождения сюжетной миссии в канализации.
Получаем приглашение на чаепитие от Шляпника. У него в заложниках находится девушка Алиса. Идём в район Бауэри. Находим на углу дома на первом этаже магазин с изображением зелёной шляпы, входим внутрь.


Спрыгиваем в комнату, где Безумный шляпник дрессирует своих зомбированных бандитов в масках кроликов. Побеждаем бандитов, допрашиваем Шляпника. Но, внезапно, подвергаемся гипнозу и попадаем в Страну чудес.
В Стране чудес включается вид сбоку. Идём вправо, дожидаемся когда выключаются электрические ловушки на полу, в это время пробегаем дальше. Доходим до обрыва и запертых ворот. Когда нет электричества на полу, подходим на край и выстреливаем бетарангами в шесть зелёных фонарей. От этого ворота опускаются, идём дальше. Перепрыгиваем следующую пропасть, забираемся по нескольким уступам, падаем в пещеру.
Комната 1. Попадаем в помещение с множеством дверей, смотрим на всё это из замочной скважины. Если войти в одну дверь, то тут же выйдешь из другой. Чтобы выйти отсюда, входим в те двери, над которым встаёт кролик на картине вверху.
Комната 3. Идём вправо до упора. На стену с изображением Шляпника наносим взрывчатый гель и взрываем его. Выбираемся наружу, видим чайную реку с воткнутыми в неё ложками и вилками. Встаём на маленькую тарелку, бэткогтем цепляемся сначала за первое кольцо, затем за второе. Входим в следующее испытание.
Комната 4. Ползем, зацепившись за уступ. В следующий уступ заползаем сида и добираемся до лестницы. Сверху идём по тросу, затем скользим по нему, чтобы сломать карту впереди. Сразу после этого бежим дальше по картам, так как нас начинает преследовать маятник.
Комната 5. Смотрим наверх, протягиваем трос. Спрыгиваем на второй этаж, ломаем устройство. Протягиваем трос между верхними точками, забираемся наверх.
Комната 6. Просто перепрыгиваем через пропасти, избегая маятника.
Комната 7. С помощью бэткогтя забираемся на верхнюю платформу. Когда она опустится, запрыгиваем в открывшийся люк на потолке.
Попадаем в комнату с Безумным шляпником и заложницей Алисой. Применяем против Шляпника обратный бэтаранг (зажимаем ПКМ, зажимаем СКМ). Шляпник пойман, Алиса освобождена.
За выполнение открывается доступ к нескольким дополнительным улучшениям, в том числе и обратный бетаранг.
Blackest Night Batsuit
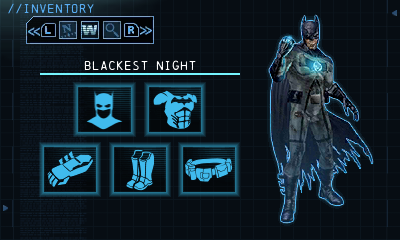 Batman’s suit when he returns from the grave. Makes you impervious to damage.
There are five pieces to collect:
-
CowlAdministration
In the basement area where The Joker locks the door, grapple up to the ledge just before the door on the right. Use the Tightrope to get to the area above. -
ChestCell Blocks
In the room with the main elevator that The Penguin used, grapple up to the highest ledge on the right. From there, use the Line Launcher to cross over to the crate on the left. -
GlovesIndustrial
Enter the vent to the right of the big “13” on the wall. In the next room, head all the way to the right, then use a an explosive to clear a hole through the pipe. Use the new space to grapple up to another platform where a crate with the item rests. -
BootsAdministration
After you cross the gap with the Line Launcher, place explosives on the two vents to stop the gas. Drop down and hack the terminal to access the room on the left. The item is inside a crate. -
BeltArkham Wing
In the Arkham Wing, climb into the shaft behind the fan that you stopped. Inside, use the Line Launcher to get to the other side.
Breakout Break-In – Detective Case #6
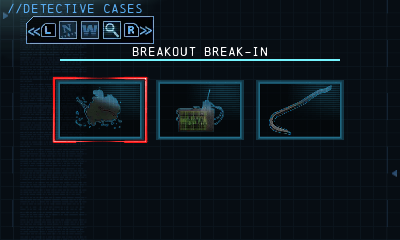 Breakout Break-In is the sixth of fourteen Detective Cases. This case contains three items to find.
- Hydraulic Fluid HoseIndustrial: In the room where you fought the thug with the electric rod for the first time, drop down to the walkway below. There should be a red vent you can enter where they hose can be found.
- Small Handmade DeviceIndustrial: Near the door that requires the Glue Gel to open. After the small chat with Catwoman, enter the next room to find the the piece of evidence on the battered desk.
- Scuffed CrowbarIndustrial: In the area that proceeds that Solomon Grundy boss fight, use an explosive on a sewage pipe that can be seen in the distance through some metal bars. Scan the bars to find the crowbar.
Ground Zero – Detective Case #1
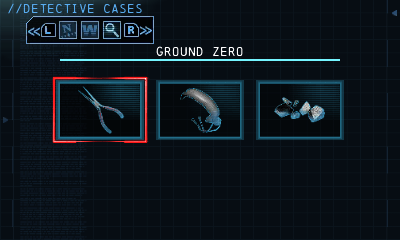 Ground Zero is the first of fourteen Detective Cases. This case contains three items to find.
- Needle-Nose PliersCell Blocks: In the area with the broken elevator shaft, jump over the gap on the bottom floor. Use your Batclaw to to get through the gate. The pliers will be in the next room.
- Chunk of Curved MetalCell Blocks: Drop down the hole and analyze the floor to find the metal bracelet. This is right before you enter the main cell block room with all the floors.
- Rubble FragmentsCell Blocks: In the main cell blocks area with the five floors, enter the vent on the bottom floor near the left entrance. As you are crawling, scan the inside of the vent just before you exit.
Red Son Batsuit
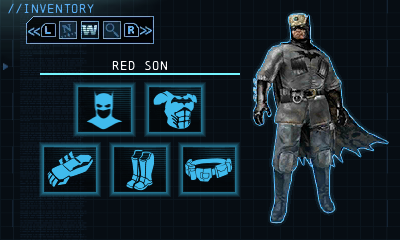 Batman’s Red Son outfit.
There are five pieces to collect:
-
CowlAdministration
After obtaining the Line Launcher, use it to cross over the gap and the electricity. In this room, grapple up the ledge, then enter the vent. In the next room, use the Lien Launcher to cross the next gap over to the crate with this item inside. -
ChestIndustrial
In the area outside the room where you found the key, drop down on the left side to find a terminal that requires the Gamma update. Open up the door to find the crate inside. -
GlovesIndustrial
In the second to last room before the back entrance and exit, grapple up the highest point, then enter the vent on the left with your Batclaw. The crate will be in the next room. -
BootsIndustrial
In the room above the room with the pressure valves where you previously fought two thugs, pull of a section of the wall off with your Batclaw, then use your Shock Batarang on the switch to open the door on the left. -
BeltAdministration
This part is given to you by Catwoman when you find the last Joker present. You can only get this part if you defeated the Joker last.
Анарки
После того, как вы закончите сюжетную миссию с Пингвином, на выходе с корабля вы услышите переговоры Анарки-экстремиста, желающего уничтожить власть и Готэм. Анарки пошлет своего напарника, который сообщит, что в городе заложены 3 бомбы. У вас будет около трех минут, чтобы добраться до первой бомбы, обезвредить противников и саму бомбу.
После этого вам нужно вернуться в Ковентри, найти второго анархиста и поговорить с ним. Он сообщит местонахождение второй бомбы. Схема та же — летим на место, обезвреживаем группы, уничтожаем бомбу.
То же самое с третьей бомбой.
Обезвредив все три бомбы, Анарки вызывают вас в здание суда. Прибыв на место нужно уничтожить всех врагов. Там вы найдете главного Анарка — Арки. Он расскажет вам проникновенную речь о продажной полиции и судьях Готэма, но его все равно нужно связать и передать полиции.
Ниндзя и Шива
Шива — знакомая Бэтмена. Их отношения можно назвать, как уважительные.
После эпизода с банком вы услышите детский плач и найдете коляску. Почти сразу вас атакует Шива, но после короткой серии контратак она остановится и расскажет, что скоро в Готэме произойдет преступление.
В торговом центре на тросе будет висеть полицейский, под ним бассейн с электричеством. Поднимаемся на тросе к левому щитку. Отключаем. На вас нападут ниндзя. Зачистите помещение, потом на тросе переберитесь к другому щитку. После отключения снова появятся друзья Шивы. Вернитесь к полицейскому, помогите ему шмякнуться наземь и поговорите с ним.
Запустите режим детектива, найдите улики. Отправляйтесь на улицу, найдите труп полицейского. На вас снова нападет Шива. Контратакуйте. Потом поговорите с ней.
Отправляйтесь в Шелдон Парк. Зачистите площадь перед парком, войдите в здание. Шива будет с приспешниками. Совет — старайтесь чаще контратаковать. После того, как снесете все здоровье Шиве, она поговорит с вами и исчезнет.
Audio
In-game audio settings.
| Audio feature | State | Notes |
|---|---|---|
| Separate volume controls | SFX, Music & Dialog. No master volume. | |
| Surround sound | Presets for headphones, TV, stereo and home theater. Up to 5.1 surround system is supported. | |
| Subtitles | ||
| Closed captions | ||
| Mute on focus lost | ||
| Royalty free audio |
Localizations
| Language | UI | Audio | Sub | Notes |
|---|---|---|---|---|
| English | ||||
| Arabic | ||||
| Czech | ||||
| French | ||||
| German | ||||
| Hungarian | ||||
| Italian | ||||
| Korean | ||||
| Japanese | PC version not released in Japan. | |||
| Polish | ||||
| Brazilian Portuguese | ||||
| Russian | ||||
| Spanish | ||||
| Latin American Spanish | To activate the Latin American Spanish language, go to And search for «Language», and place «Esm». |
The Joker is Wild – Detective Case #2
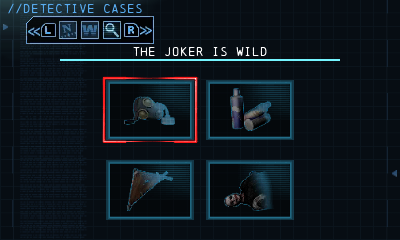 The Joker is Wild is the second of fourteen Detective Cases. This case contains four items to find.
- Gas MaskAdministration: Enter the room where The Joker left a present that had to be opened by popping the surrounding balloons. Enter the vent in the middle of the room. Exit the vent, then scan the floor on the left to find the gas mask.
- Empty CansAdministration: After The Joker locks you in the sewers down below the Administration rooms, use an eplosive on the wall where a pipe can be seen in the next room. Run to the right and shimmy over to another walkway. Walk to the left, then use your Line Launcher to cross over to the pipe where the empty cans rest.
- Metal PipesAdministration: In the hallway that leads to the area where you fought The Joker, grapple up to the next floor through the hole, then bomb the wall on the right. The metal pipes can be found on a couple of boxes in the next room.
- Dead GuardAdministration: In the very first room you enter in the entire zone, find the dead guard in the corner of the hallway.
Kidnapped – Detective Case #3
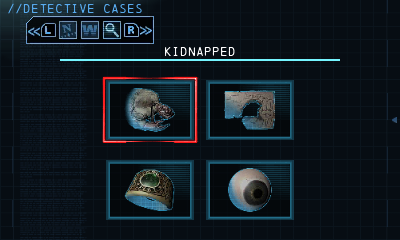 Kidnapped is the third of fourteen Detective Cases. This case contains four items to find.
- Assistant WardenAdministration: After you pass the first switch, the deceased assistant warden can found in the next room.
- Hand Drawn MapAdministration: In the attic like room, just after the Deadshot fight. It will be on the left side of the room.
- Class RingAdministration: After crossing over the the poisonous gas, enter a room with an opening in the ceiling. You can find the class ring on the box on the right.
- Glass EyeAdministration: After you move the bookshelf, scan the area above the vent to find a glass eye.
Зашифрованные радиосообщения
При использовании дешифратора во время игры, можно поймать три скрытые частоты на которых передаются наборы цифр. При расшифровке мы получаем три сообщения:
-“Я вернусь, Бэтмен”
-“Вы заплатите за то, что сделали со мной”
-“Страх разорвет Готэм Сити в клочья”
Все это ключевые фразы, расшифровав которые мы получаем последнее сообщение:
“Пугало” Теперь можно смело предположить, что все эти сообщения от Доктора Джонатана Крэйна, он же Пугало.
Пугало является одним из самых запоминающихся злодеев в Batman: Arkham Asylum, и единственным из тех кто не появляется в Arkham City лично.
Судя по этим трем сообщения и секретном убежище спрятанном внутри лодки, можно предположить, что в будущем Пугало вернется и у него большие планы на Готэм Сити.
Information Gathering – Detective Case #14
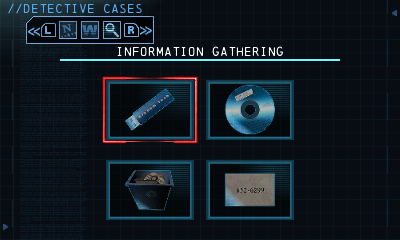 Information Gathering is the fourteenth and final of the fourteen Detective Cases. This case contains four items to find.


- Thumb DriveAdministration: When you make outside just before seeing the Warden, pull off the grate from the vent on the left wall. Enter the vent to find yourself in another room. Scan the room for the thumb drive.
- DVDAdministration: After you grapple into the next room from the area that the Joker locked you in, find the Recordable DVD on top of some fallen cabinets.
- Burned PaperAdministration: Starting in the main hall with the staircase, grapple to the left ledge and enter the door. Continue on left until you reach a terminal. Hack the door open to find the paper inside.
- Business CardAdministration: In the long vertical vent area near the Warden’s office, grapple up tot he very top ledge, then use the Line Launcher to get over to the right side where the card rests.
Sixty Feet Under – Detective Case #4
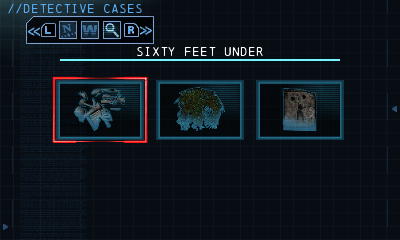 Sixty Feet Under is the fourth of fourteen Detective Cases. This case contains three items to find.
- Skeletal RemainsIndustrial: As you are using the secret entrance, enter the area with all the gates. Enter the bottom right gate and Drop off the walkway. Use the Line Launcher to get to the other side. The pile of bones can be found in the corner.
- Plant MatterIndustrial: Enter the vent that takes you to the start of the secret entrance. As you are crawling down the stairs, scan the moss to find this piece of evidence.
- Circus FlyerIndustrial: In the area where you fought Solomon Grundy, run all the way to the right to find the flyer in the debris.
Bird of Prey – Detective Case #5
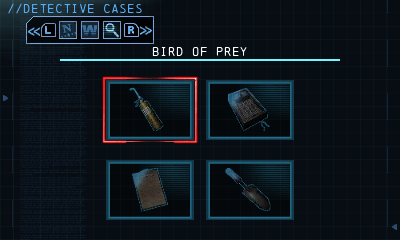 Bird of Prey is the fifth of fourteen Detective Cases. This case contains four items to find.
- Maintenance TorchCell Blocks: As you fall down the hole you made with the heavy beam, grapple to the vent on the right. This will take you to a small room with the Acetylene torch.
- Damaged KeypadCell Blocks: Before calling down the elevator, drop down the elevator shaft to find a small vent on the right. Enter it and find the damaged keyboard in the next room.
- Prison ClipboardCell Blocks: As soon as you start the entire Administration zone, grapple up to the ledge and then to the one on the right. Drop down to the ground below to find the clipboard on the right.
- Small SpadeCell Blocks: In the area where you blew up the two pipes to take out two thugs on the floor above you, enter the vent on the left and scan the room for the spade when you can stand up.
Особые предметы, которые можно обнаружить в процессе игры
У Энигмы находится секретная информация об известных личностях города. Пройдя все испытания, Бэтмен получит блоки данных. Выполняя побочные задания, он найдет секретные дневники. Также придется решать загадки Анарки и собирать различные аудиофайлы.
Критики и пользователи не так высоко оценили игру, в отличие от предыдущих частей. Основная претензия была к отсутствию новшеств в геймплее. Также геймеры были недовольны частыми багами, которые мешали играть. «Бэтмен: Аркхем Ориджинис» неплоха, но не получила столько же восторженных отзывов как «Аркхем Асилум» и «Аркхам Сити».
Input
In-game control settings.
In-game key map settings.
| Keyboard and mouse | State | Notes |
|---|---|---|
| Remapping | Cannot bind action to key with modifier (e.g. LShift+RClick) | |
| Mouse acceleration | Acceleration is disabled by default. | |
| See . | ||
| Mouse input in menus | ||
| Mouse Y-axis inversion | ||
| Controller | ||
| Controller support | ; set switch to X for F310, F510 and F710. | |
| Full controller support | ||
| Controller remapping | See the glossary page for potential workarounds. | |
| Controller sensitivity | ||
| Controller Y-axis inversion | Options exist in Game Options, Invert: look, rotation, flight controls, and Batarang flight controls |
| Controller types |
|---|
| XInput-compatible controllers |
|---|
| Generic/other controllers |
|---|
| Additional information | ||
|---|---|---|
| Button prompts | ||
| Controller hotplugging | ||
| Haptic feedback | ||
| Digital movement supported | ||
| Simultaneous controller+KB/M |
- There is no mouse sensitivity slider in-game.
| .ini edit[citation needed] |
|---|
|
Shadow artifacts on Batman’s cape, blurry shadows, textures load improperly.
- There are visible bugged shadow artifacts on Batman’s cape, along with low-res character shadows. There are also blurry, low-res textures, which do not load properly.
| Edit the BMEngine.ini file |
|---|
|
Other information
API
| Technical specs | Supported | Notes |
|---|---|---|
| Direct3D | 9.0c, 11 | Multiplayer only uses D3D9. Use parameter to force D3D9 usage. |
| Shader Model support | 3, 5 |
| Executable | 32-bit | 64-bit | Notes |
|---|---|---|---|
| Windows | A 64-bit OS is recommended but not required to run the game. |
Add PS3 exclusive DLCs
- Requires either Millennium Skins Pack, Infinite Earths Skin Pack or Season Pass (only one of these is necessary).
- Adds 3 new Combat Challenge maps and 2 new Predator maps.
- Adds 3 new skins for Batman (Classic TV Series, Knightfall and New 52 Metallic)
| Install patch[citation needed] |
|---|
|
Game data
In-game general settings.
Configuration file(s) location
| System | Location |
|---|---|
| Windows | \SinglePlayer\BMGame\Config\\Documents\WB Games\Batman Arkham Origins\BMGame\Config\Documents\WB Games\Batman Arkham Origins\GFXSettings.BatmanArkhamOrigins.xml |
| Steam Play (Linux) | /steamapps/compatdata/209000/pfx/ |
- Some of the game configuration files (key binds) are encrypted.
Save game data location
| System | Location |
|---|---|
| Windows | \Documents\WB Games\Batman Arkham Origins\SaveData\ |
| Steam | \userdata\\209000\ |
| Steam Play (Linux) | /steamapps/compatdata/209000/pfx/ |
Transfer Steam saves to GOG.com
- Steam saves are compatible with the GOG.com version. Copy the save files from the Steam location to the Windows location as noted in .
| System | Native | Notes |
|---|---|---|
| GOG Galaxy | ||
| Origin | ||
| OneDrive | Requires enabling backup of the Documents folder in OneDrive on all computers. | |