
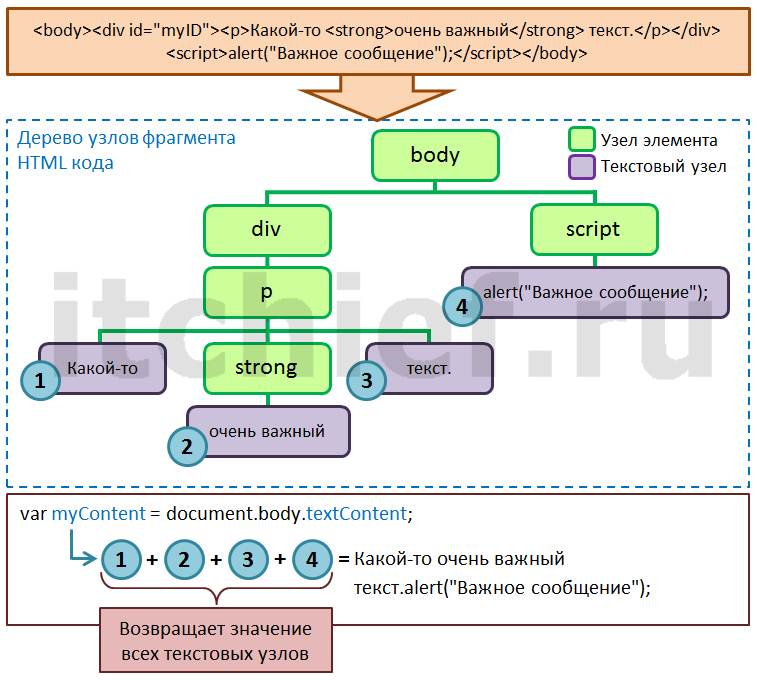
How does it work?
When you use flutter bloc you are going to create events to trigger the interactions with the app and then the bloc in charge is going to emit the requested data with a state, in a real example it will be like that:
1- The user clicks on a button to get a list of games.
2- The event is triggered and it informed to the bloc that the user wants a list of games.
3- The bloc is going to request this data ( from a repository for example, which is in charge of connecting to the API to get the data).
4- When the bloc has the data it will determine if the data is a Success or is Error, and then it’s going to emit a state.
5- The view is going to be listening to all the possible states that the bloc could emit to react to them. For instance, if bloc emits Success as a state the view is going to rebuild it with a list of games, but if the state is Error the view is going to rebuild with an error message or whatever you want to show.
Асинхронный код виджета группы ВКонтакте
Победить созданную задачу поможет вот этот код:
<div id="vk_groups"></div>
<script type="text/javascript" src="https://vk.com/js/api/openapi.js" async></script>
<script type="text/javascript">
( function start() {
	if ( window.VK ) {
		VK.Widgets.Group( "vk_groups", { ваши_параметры }, ваш_id );
	} else setTimeout( start, 500 );
} )();
</script>
Принцип прост, как первый советский трактор. Мы выполняем проверку существования объекта «VK» в нашем окне, и если его ещё нет (значит, скрипт ВК ещё не загрузился), то назначаем повторную проверку через полсекунды. А когда при очередной проверке мы обнаружим объект «VK», вызовем функцию отображения группы ВКонтакте. Если вы правильно указали «ваши_параметры» и «ваш_id» (их скопируйте из оригинального кода, полученного на сайте vk.com), то код виджета группы ВКонтакте будет вызван асинхронно, и прорисовка страницы не приостановится на моменте вызова скрипта ни на секунду.
Теперь заменим синхронный код рекламного блока Google Adsense на асинхронный. Сейчас он выглядит у нас как-то вот так, и тормозит загрузку страницы:
<script type="text/javascript">
google_ad_client = "ca-pub-...";
google_ad_slot = "...";
google_ad_width = x;
google_ad_height = y;
</script>
<script type="text/javascript" src="https://pagead2.googlesyndication.com/pagead/show_ads.js">
Показывать блок рекламы после того, как DOM готов
В коде каждого рекламного блока имеется строка:
(adsbygoogle = window.adsbygoogle || []).push({});
Если эту строку заменить на:
$(document).ready(function(){(adsbygoogle = window.adsbygoogle || []).push({})})
То код блока будет запускаться после готовности DOM. Данный метод требует jQuery и срабатывает не для всех случаев.
Вариант не требующий jQuery:
window.onload = function() {
    (adsbygoogle = window.adsbygoogle || []).push({});
}
И ещё один вариант (только для современных браузеров):
document.addEventListener("DOMContentLoaded", function() {
    (adsbygoogle = window.adsbygoogle || []).push({});
});
Варианты, не требующие jQuery, также срабатывают не всегда – зависит от конкретной причины вашей проблемы.
В Angular:
$timeout(function () {
    (adsbygoogle = window.adsbygoogle || []).push({});
});
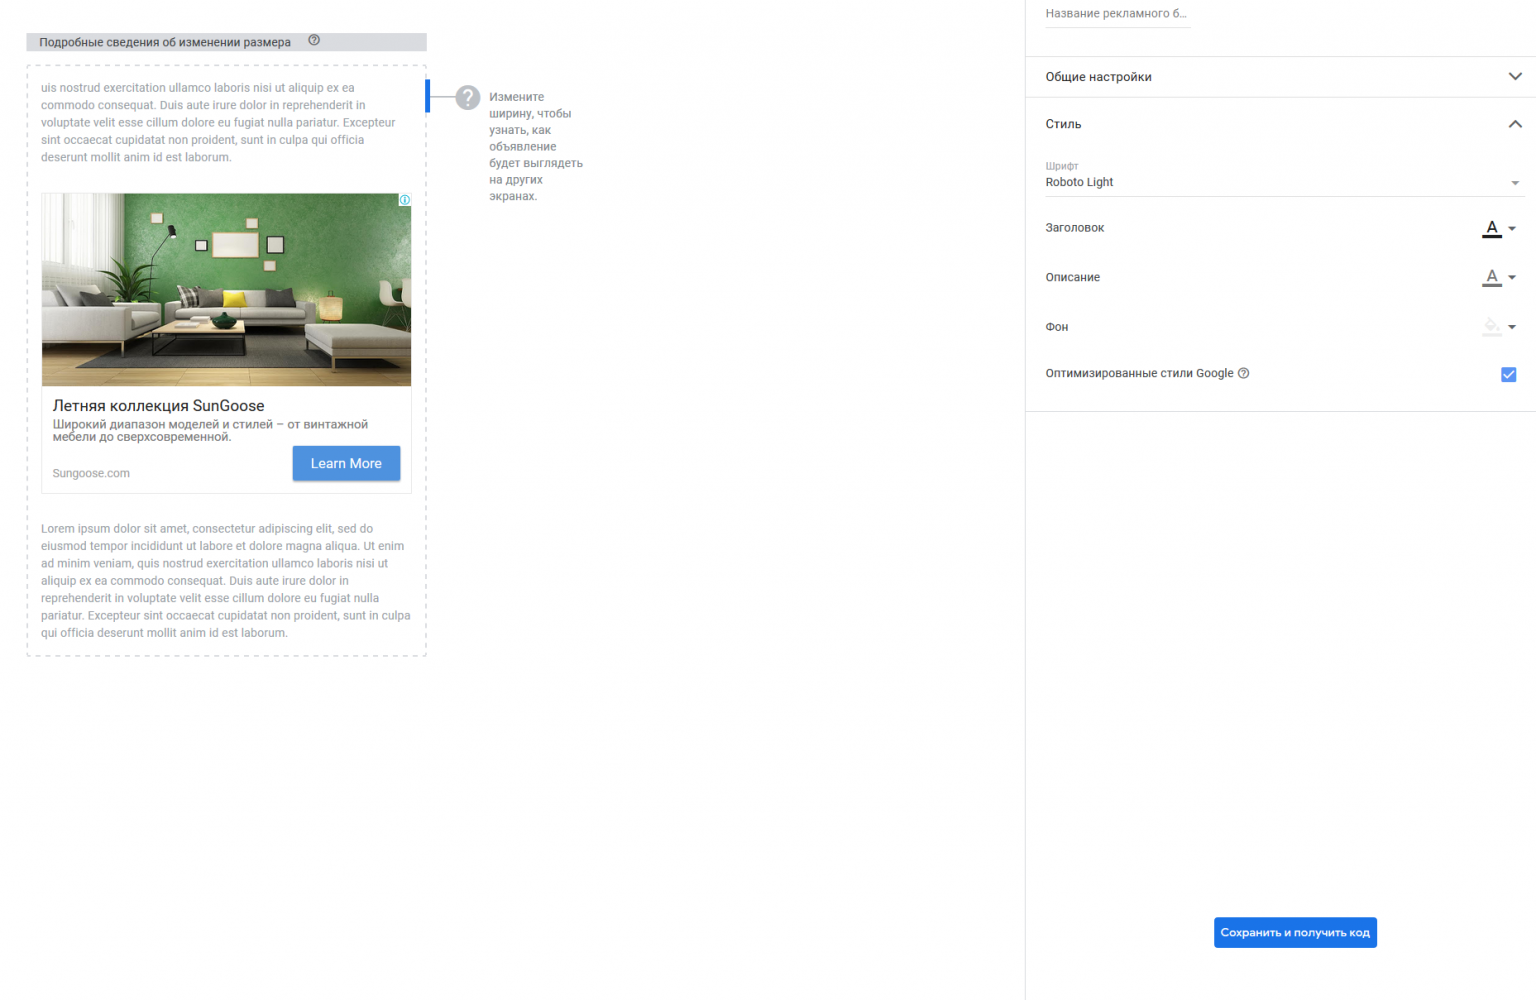
Фиксированный размер рекламного блока в зависимости от ширины экрана
В этом разделе рассказывается, как задать размеры адаптивного рекламного блока для экранов мобильных устройств и компьютеров. Это смогут сделать даже те пользователи, которые никогда раньше не работали с медиа-запросами в CSS и не вносили изменения в рекламный код AdSense.
Вот примеры фиксированного размера рекламного блока в зависимости от ширины экрана:
- размер рекламного блока для экранов с шириной меньше 500 пикселей – 320 x 100;
- размер рекламного блока для экранов с шириной в диапазоне от 500 до 799 пикселей – 468 x 60;
- размер рекламного блока для экранов с шириной 800 пикселей или больше – 728 x 90.
Как адаптировать этот образец кода для вашего сайта
-
Создайте медийный рекламный блок в аккаунте AdSense, выбрав в разделе «Размер объявления» вариант Адаптивный. Сохраните из кода объявления следующую информацию:
- идентификатор издателя (например, ca-pub-1234567890123456);
- идентификатор рекламного блока в поле (например, 1234567890).
- В образце кода выполните следующие действия:
- Замените все экземпляры на уникальное название, например Glavnaya_stranitsa или glavnaya_stranitsa_123.
Примечания- Уникальное название должно содержать только английские буквы (A–Z), цифры и символы подчеркивания и начинаться с английской буквы.
- Каждый раз, адаптируя этот фрагмент кода, необходимо использовать новое уникальное название.
- Замените своим идентификатором издателя.
- Замените идентификатором своего рекламного блока.
- Замените все экземпляры на уникальное название, например Glavnaya_stranitsa или glavnaya_stranitsa_123.
- Определите, какое пространство на экране должен занимать ваш рекламный блок.
- Если вас устраивают размеры, указанные в образце кода, не изменяйте значения.
- Если вы хотите установить другие размеры, выполните следующие действия в образце кода:
- Замените значения и шириной и высотой рекламного блока, который вы хотите использовать для экранов с шириной меньше 500 пикселей.
- Замените значения и шириной и высотой рекламного блока, который вы хотите использовать для экранов с шириной в диапазоне от 500 до 799 пикселей.
- Замените значения и шириной и высотой рекламного блока, который вы хотите использовать для экранов с шириной 800 пикселей или больше.
- Скопируйте и вставьте измененный код объявления в исходный HTML-код нужных страниц.
Примечание. Добавив рекламный код, проверьте, корректно ли отображаются объявления на разных устройствах и экранах.
Стратегия монетизации сайта
В настройках Adsense настраиваем процент выполняемых запросов объявлений:
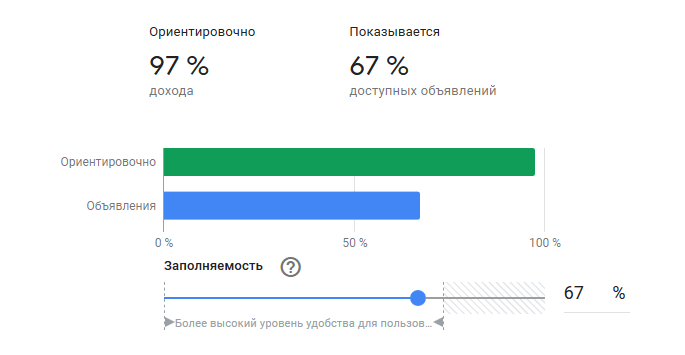
В моем случае Adsense показывает лишь 67% запрошенных объявлений, что дает мне 97% дохода. Вместо остальных 33% будет показана альтернативная реклама из файла . Подробнее можно прочитать здесь.
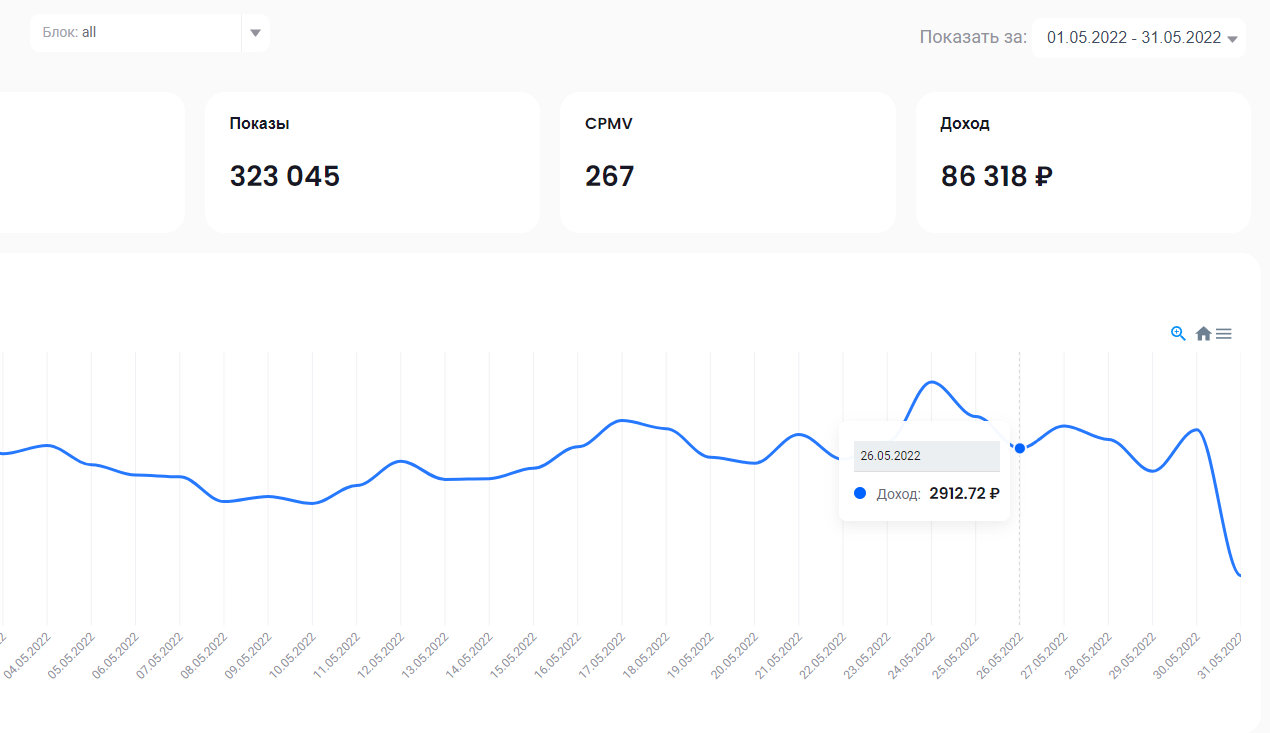
Далее в статистике Adsense смотрим доход на тысячу показов за последние 28 дней:
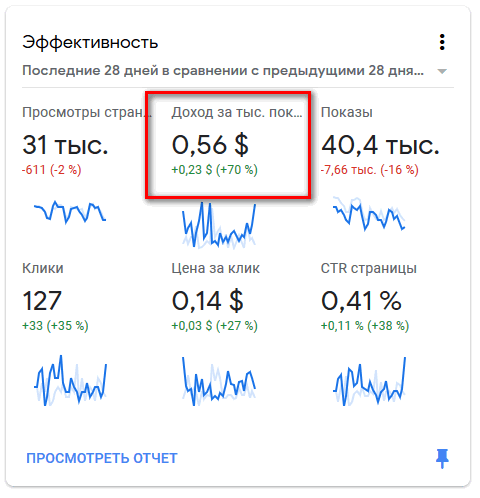
Запоминаем это число, оно нам пригодится при настройке стратегии РСЯ. Можете сразу его перевести в рубли по текущему курсу.
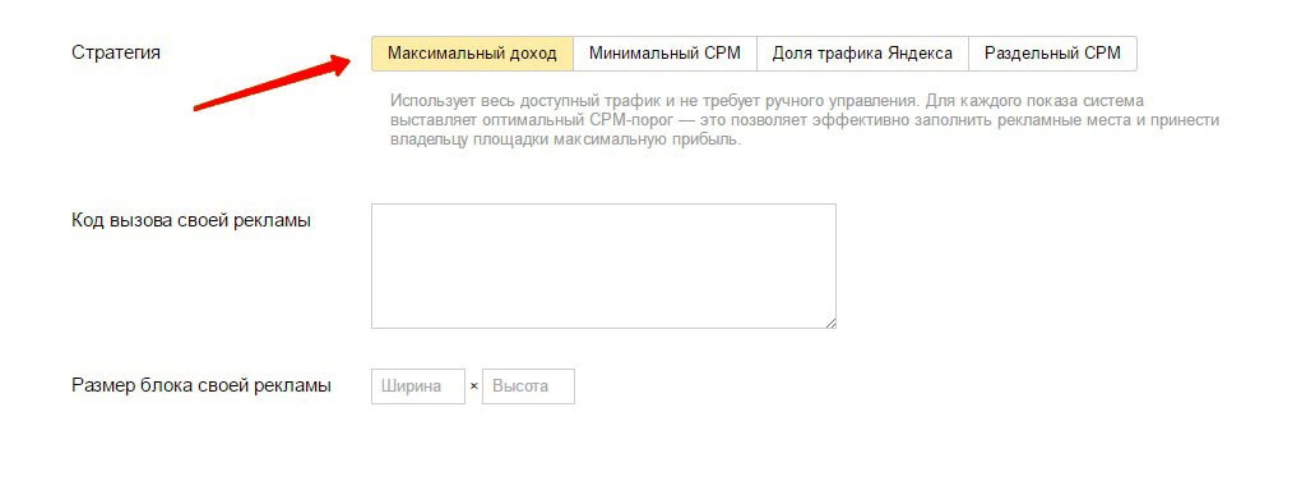
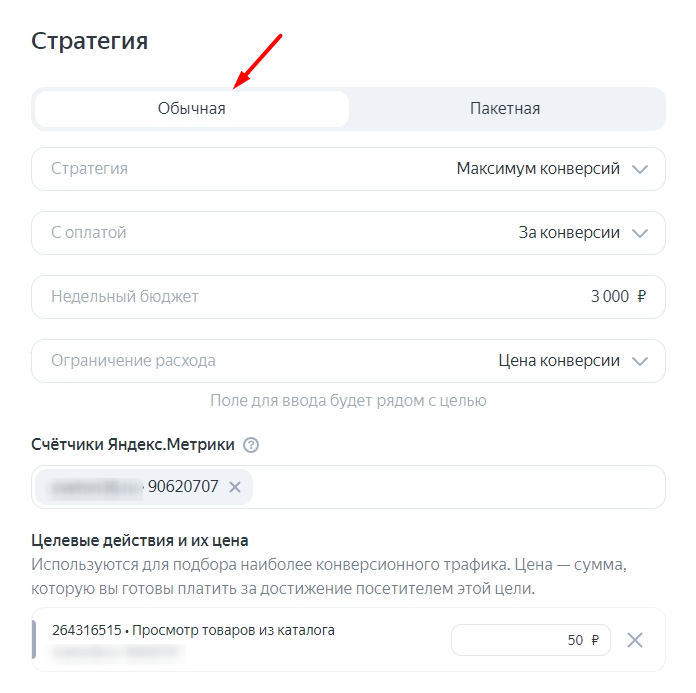
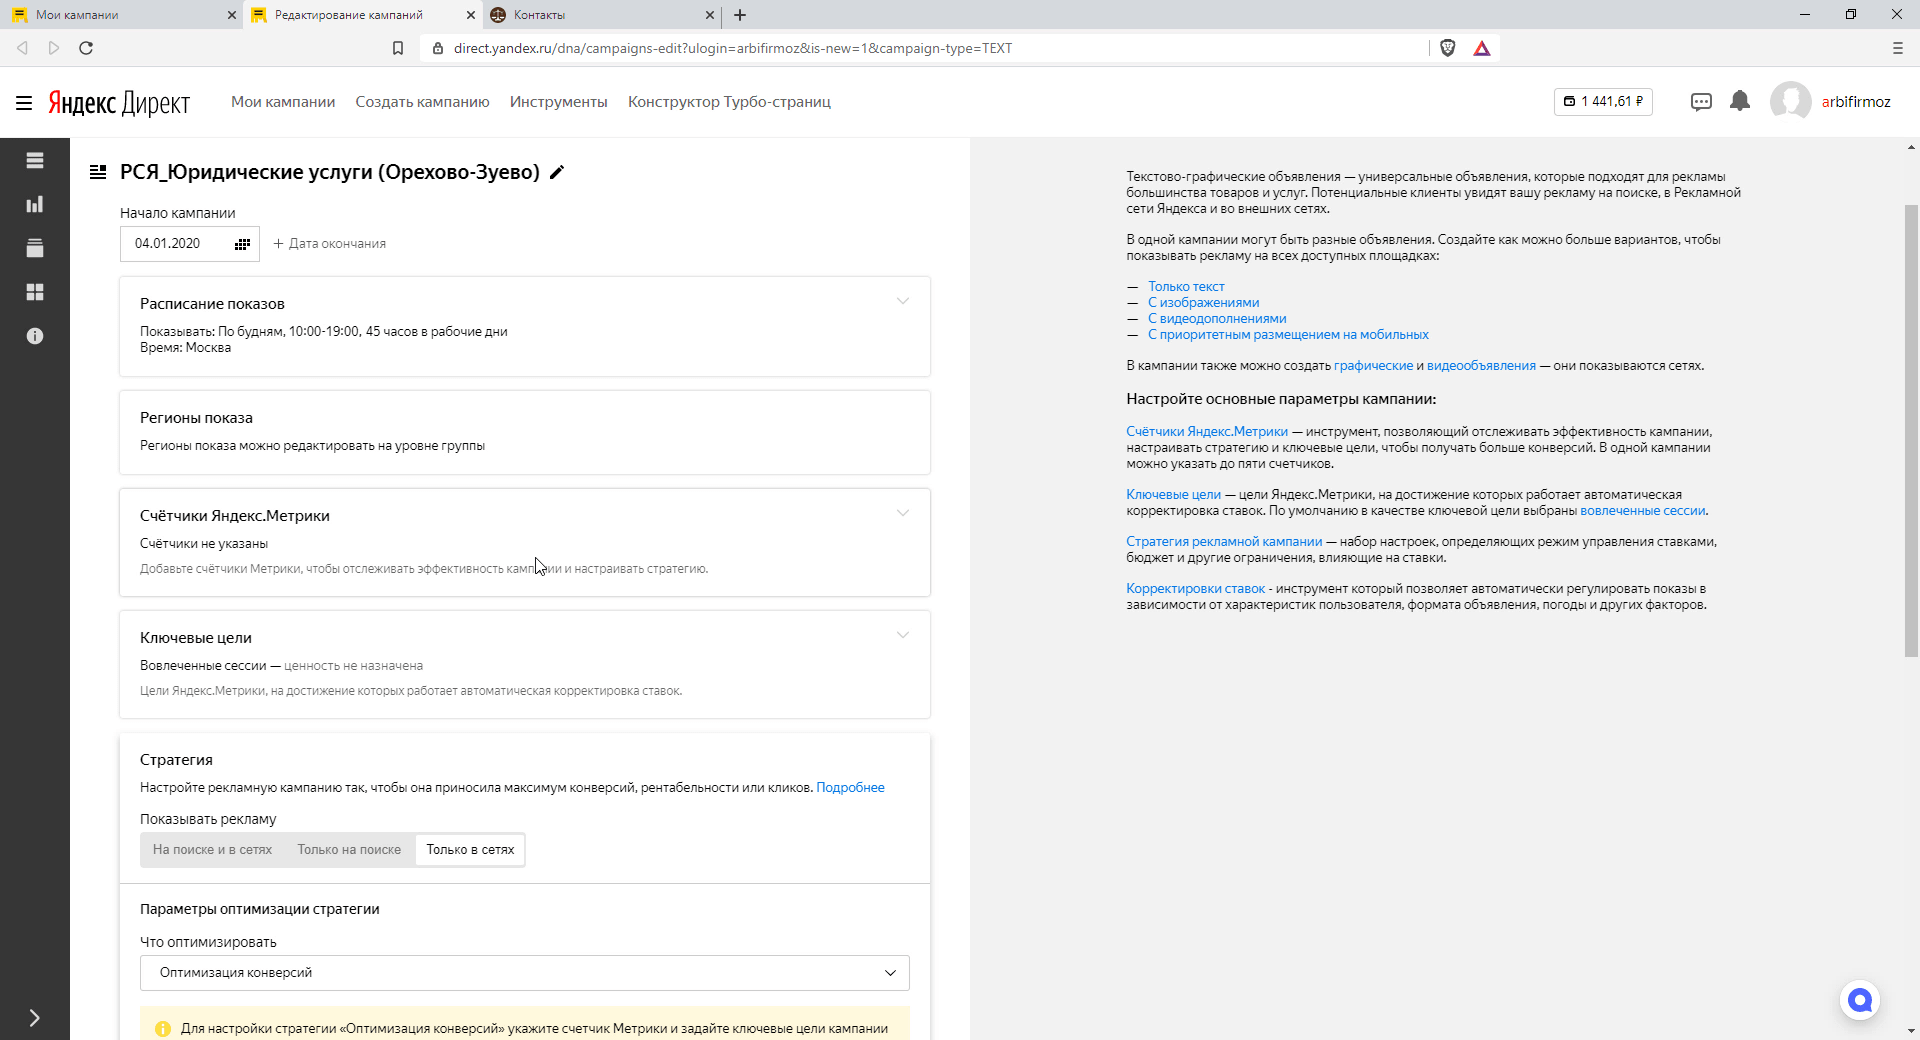
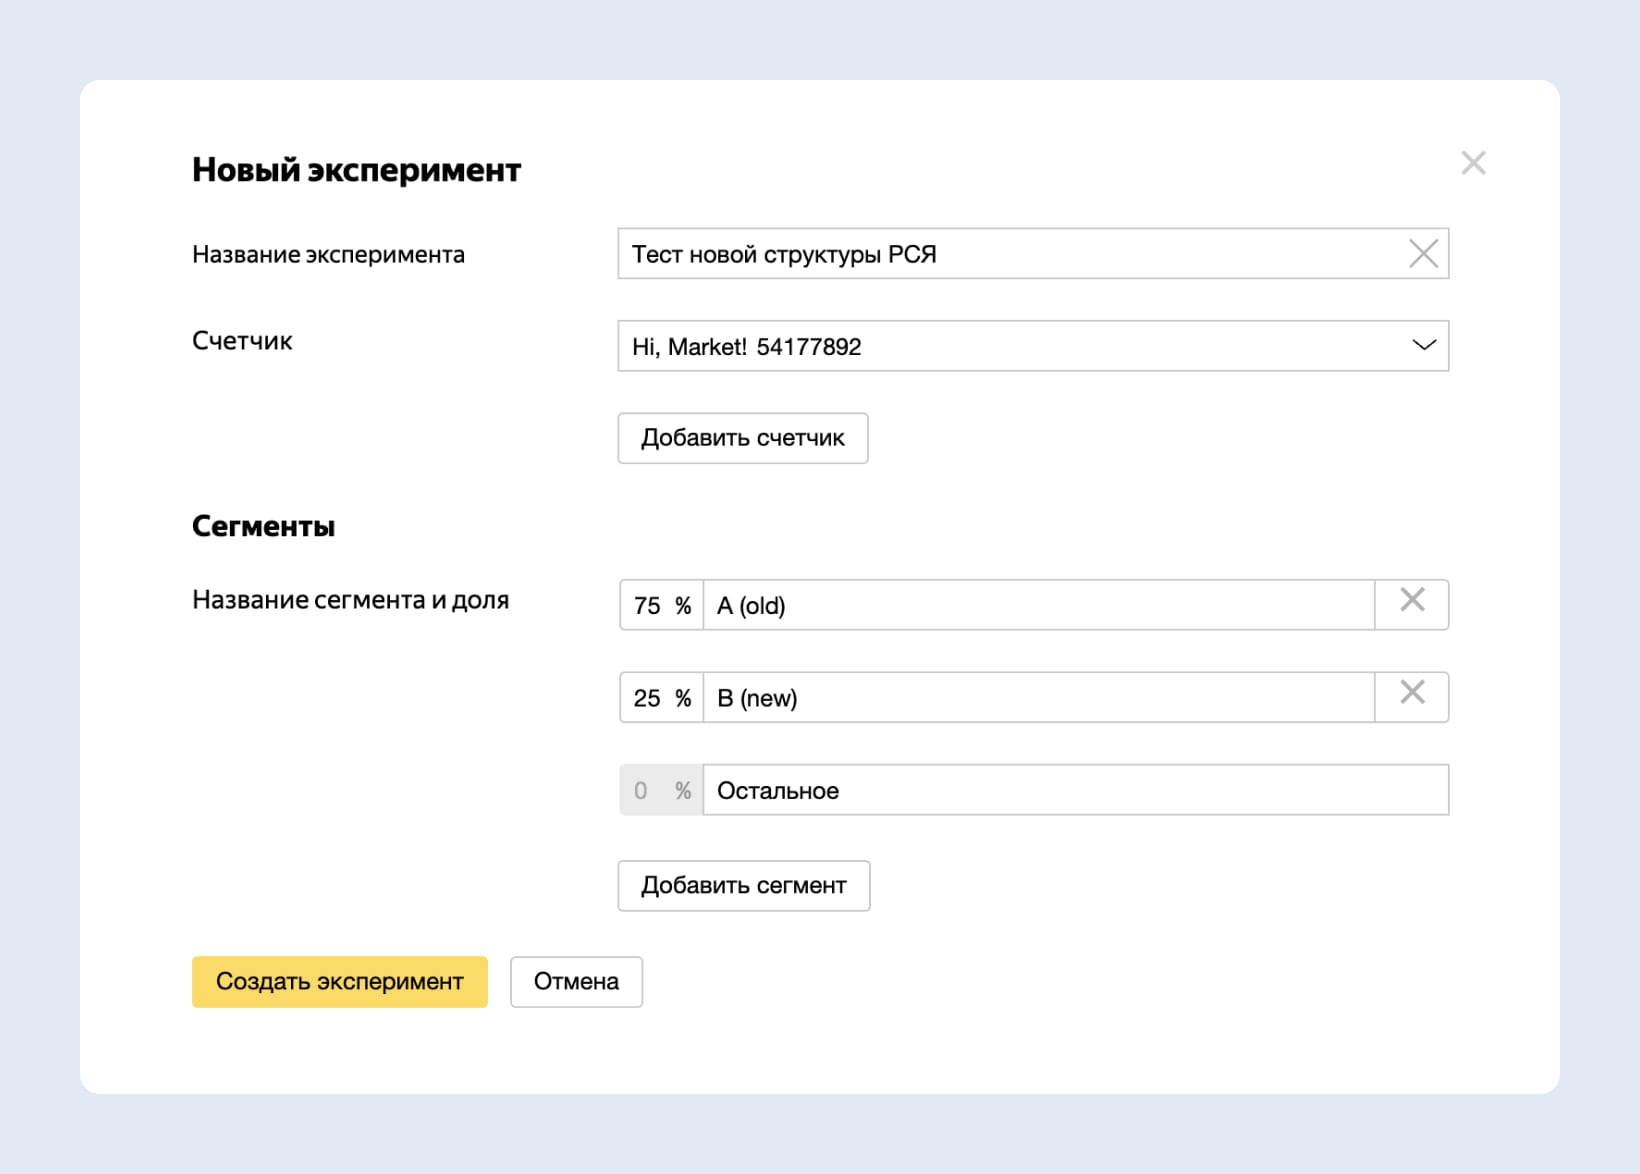
Теперь переходим в настройки рекламного блока РСЯ и выбираем стратегию «Минимальный CPM»:
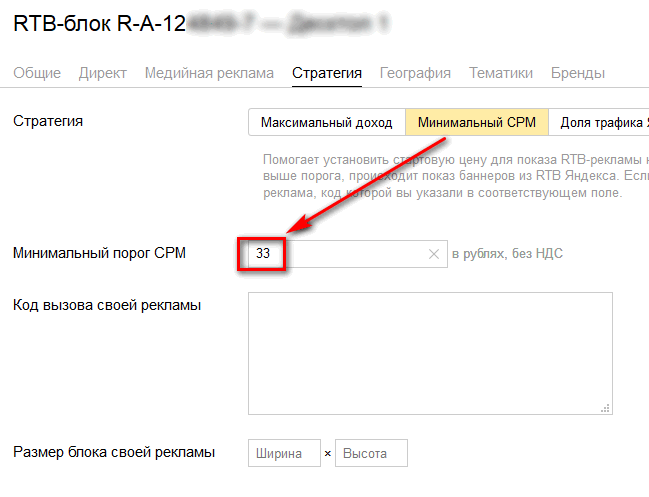
В качестве пороговой цены используем значение дохода на тысячу показов Adsense в рублях по текущему курсу.
Как установить рекламные объявления Google AdSense на сайт?
AdSense предъявляет следующие требования к участникам программы:
- качественный, оригинальный и не запрещённый правилами этой сети контент на сайте;
- возраст участника больше 18 лет;
- доступ к HTML-коду ресурса, для того чтобы подтвердить право собственности на сайт.
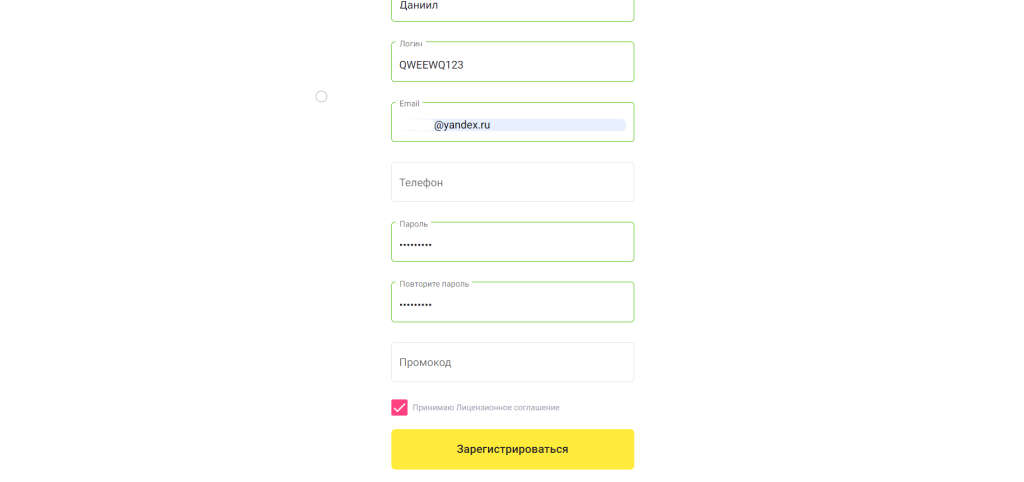
При соответствии этим условиям переходим к заполнению регистрационной формы (необходимо иметь аккаунт Google).
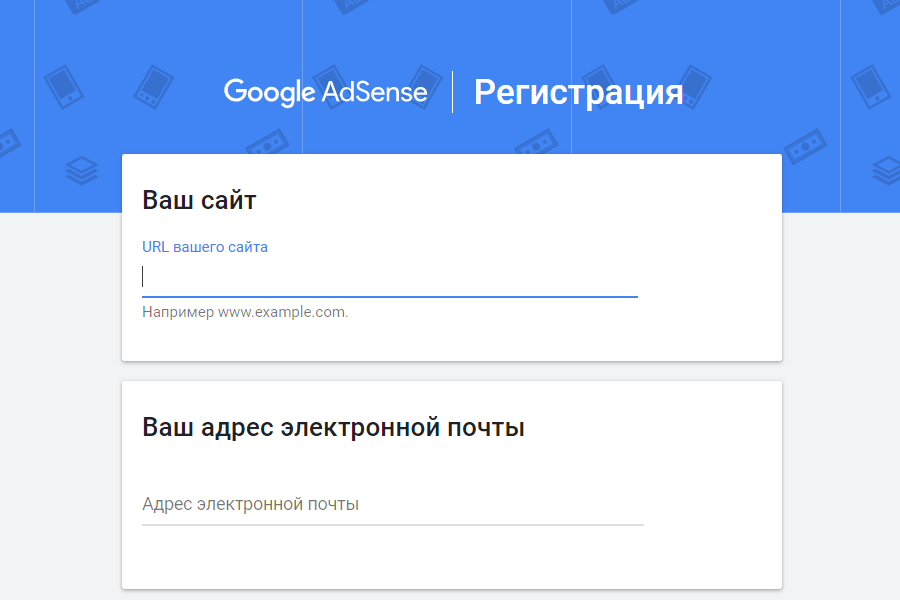
Вводим корректные данные и отправляем форму. После успешной проверки, мы переходим в личный кабинет в раздел «Объявления».
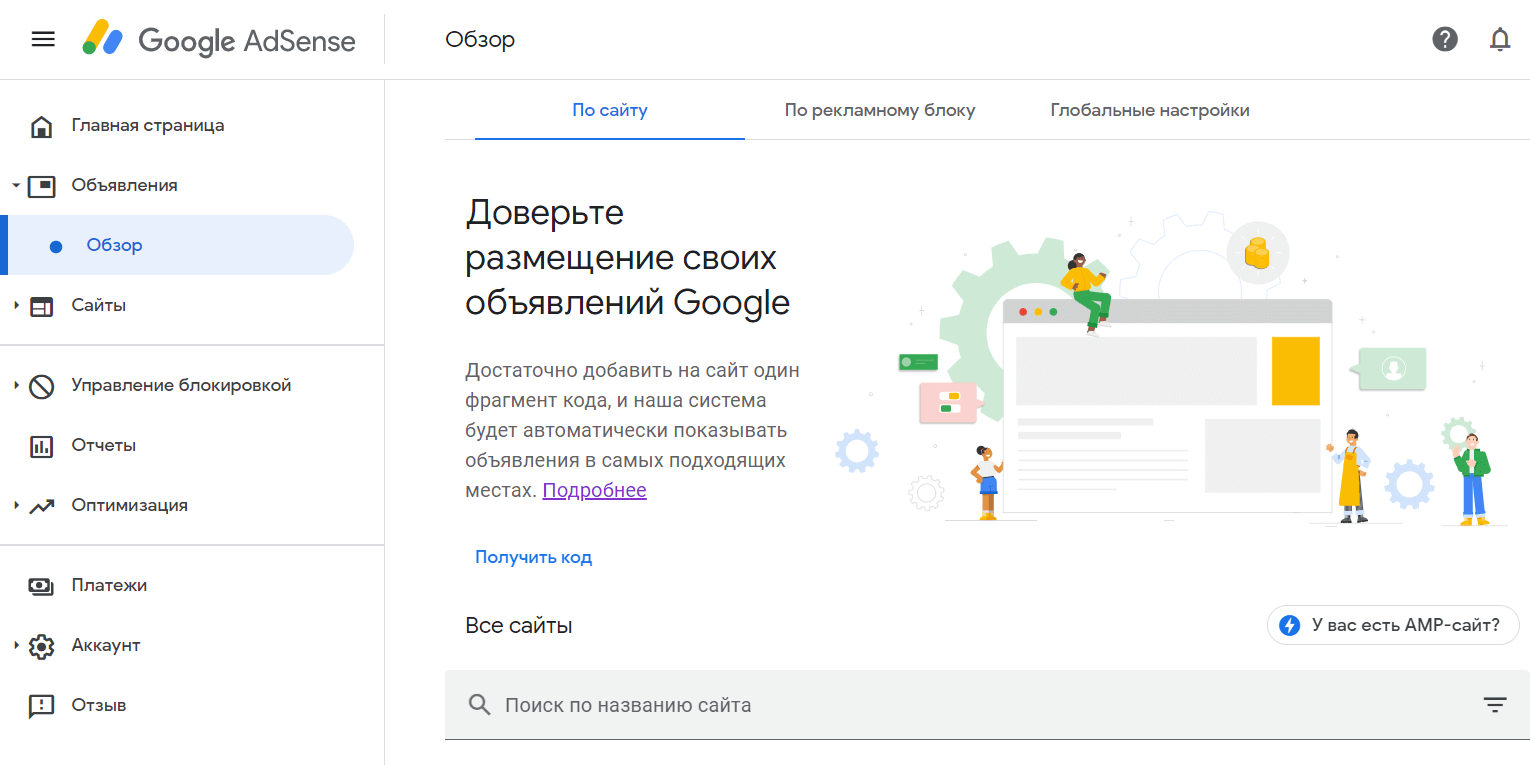
Здесь мы можем выбрать между самостоятельным (ручным) размещением объявлений на сайте и автоматическим.
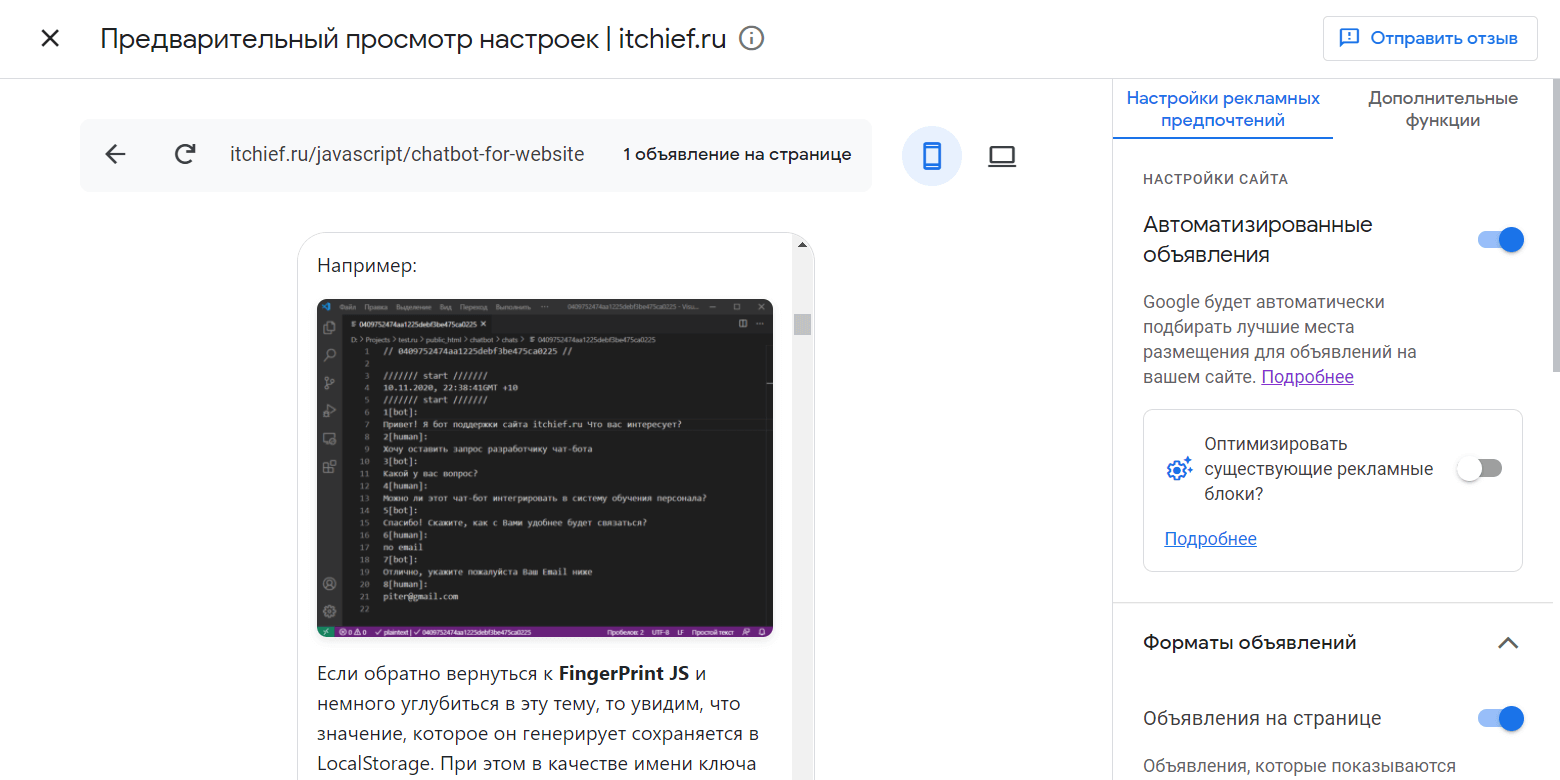
Автоматизированные объявления
Автоматизированные объявления — это автоматический способ размещения объявлений на ресурсе. От издателя требуется только вставить предложенный код, а всё остальное за вас будет делать сама система (т.е. искать места размещений и отображать в них объявления).

С одной стороны, это очень удобно. Но с другой, это довольно сильное ограничение, т.к. вы не можете самостоятельно настроить места для объявлений и проводить с ними различные тесты.
При использовании автоматизированных объявлений вы не можете точно знать где они отобразятся на странице, система может их расположить в любых местах, в том числе и в самых не подходящих (например, в шапке, меню, футере). В некоторых случаях это даже может приводить к искажению макета сайта.
Кроме этого, при размещении не учитываются рекламные места других партнёрских сетей, в результате реклама может быть вставлено близко к другой.
В настройках, конечно, можно удалить различные места размещений. Но это нужно постоянно отслеживать и вносить в изменения в настройки.


Если минусы это способа вы принимаете и они для вас не являются принципиальными, то тогда используйте его. Тем более что подключение и настройка рекламы AdSense таким образом выполняется в пару кликов.
В настройках мы можем выбрать форматы объявлений, а также поэкспериментировать с количеством объявлений для показа:
Ручная настройка объявлений
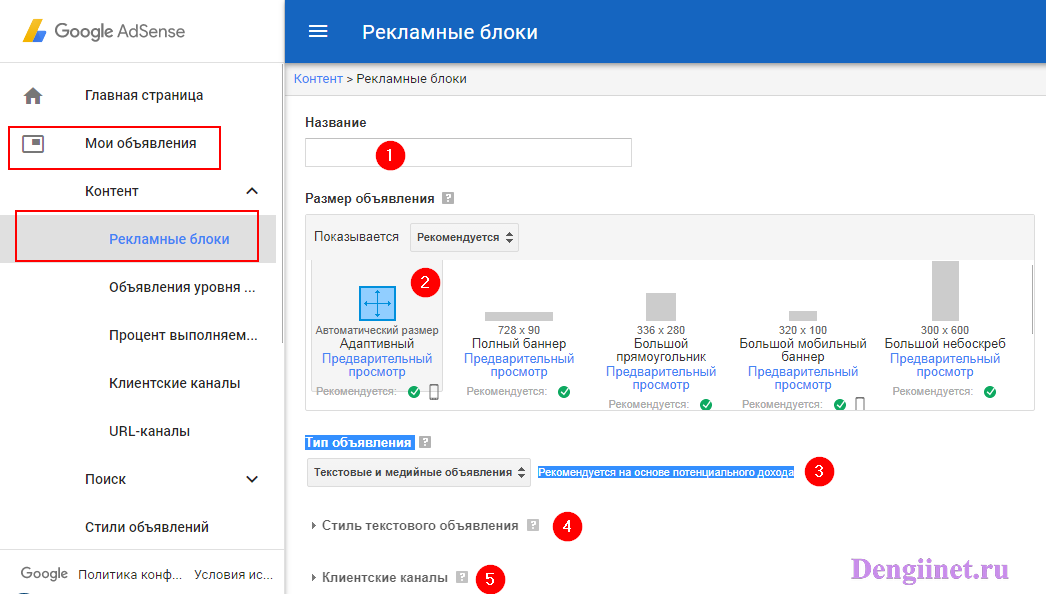
Процесс работы с обычными объявлениями начинаются с их создания. Для этого его нужно перейти на вкладку «По рекламному блоку».
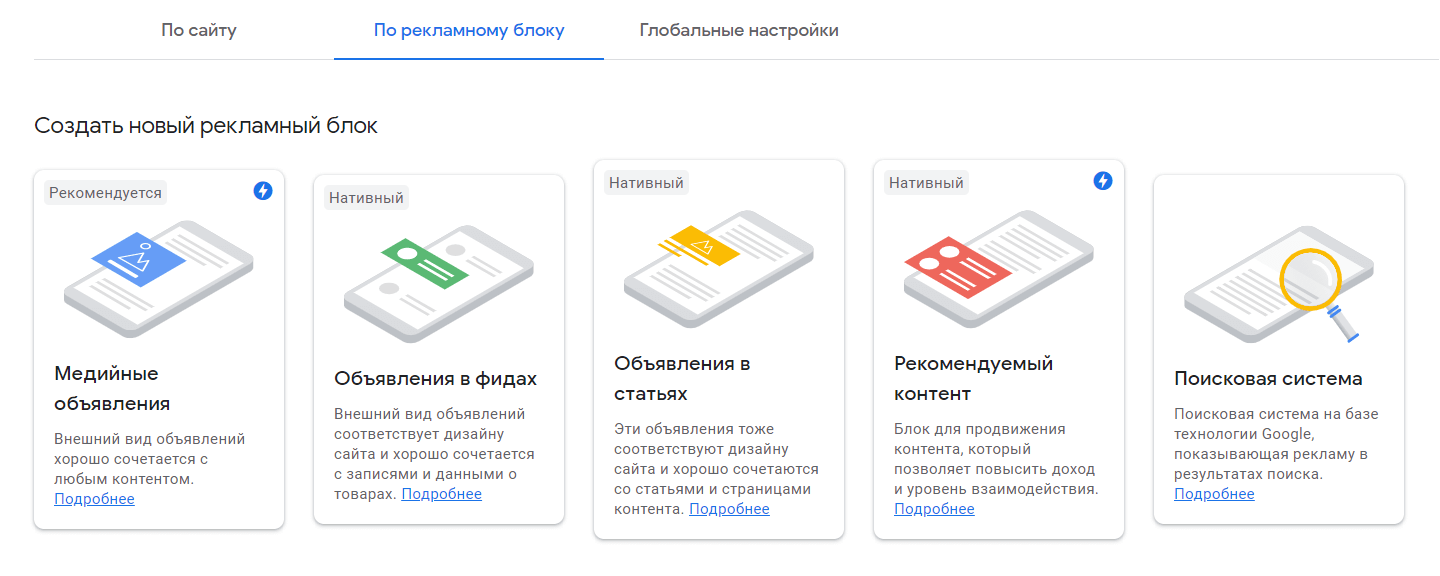
Виды рекламных блоков в Google AdSense:
- медийные объявления;
- объявления в фидах;
- объявления в статьях;
- рекомендуемый контент;
- поисковая система.
Для создания нужного блока нужно кликнуть на его карточку, указать ему название и настроить его внешний вид.
Пример настройки медийного объявления:
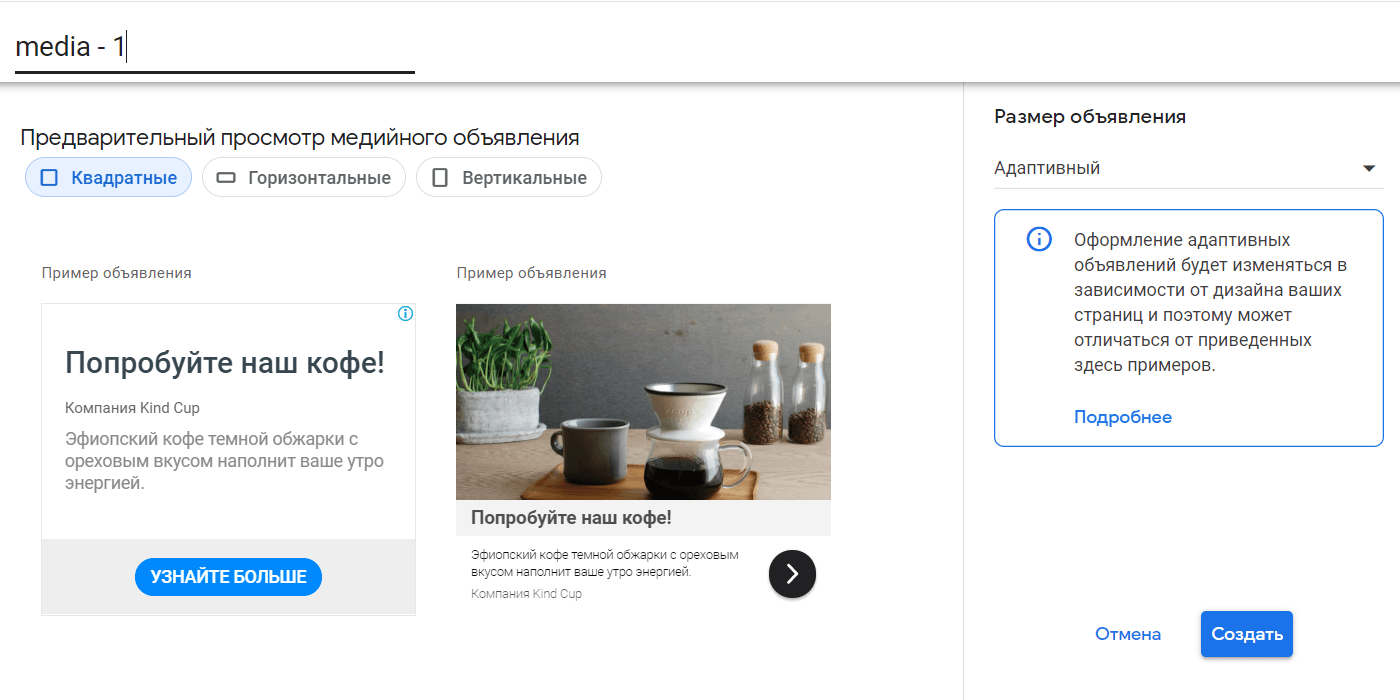
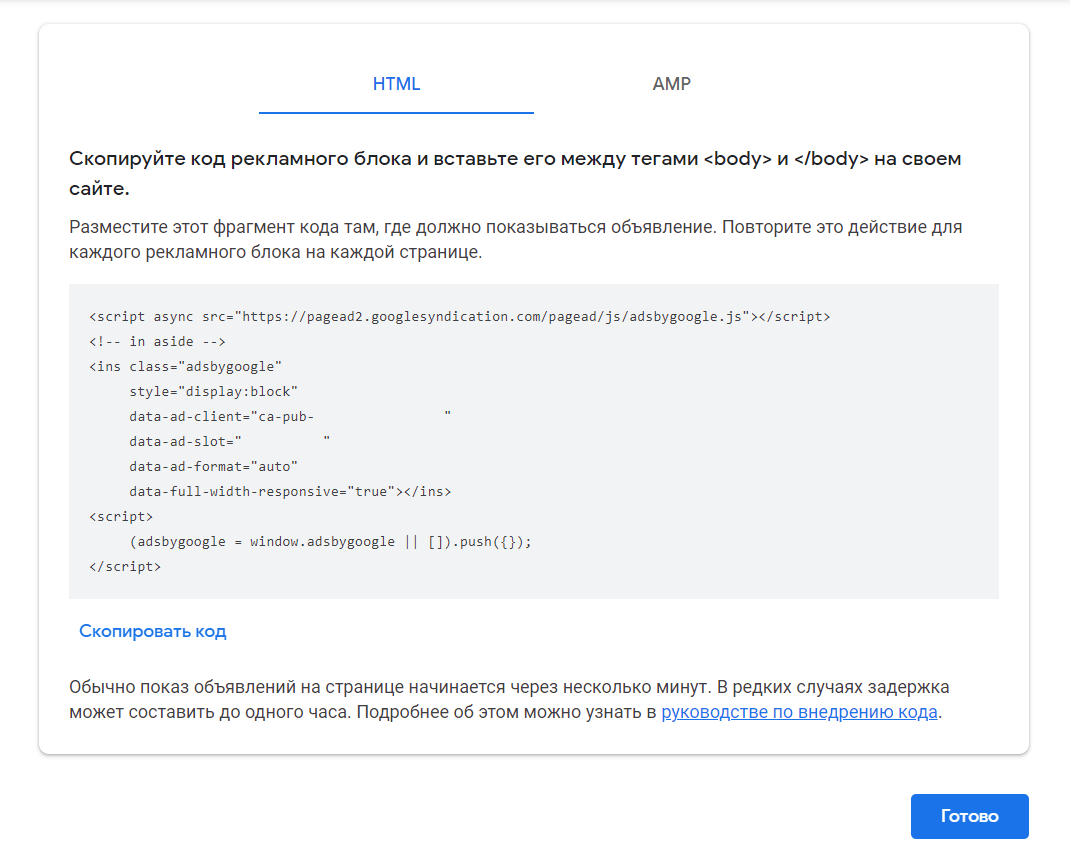
После настройки нажмите на кнопку «Создать». Полученный код объявления нужно скопировать и разместить его на странице там, где должно показываться объявление.
How to Get Google Adsense Ads on your website
First start a blog on WordPress or Blogger. Write about 10 to 15 quality articles which are more than 500 words. Wait for 2 to 3 months to get good search impressions in Google. Sometimes it happens more quickly. Then using your Google account (which is nothing but your @gmail id) you can apply for Adsense.
An initial code is to be placed in your post header pages, to get Adsense approval. This script will look like this.
<script async src="https://pagead2.googlesyndication.com/pagead/js/adsbygoogle.js"></script>

<script>

     (adsbygoogle = window.adsbygoogle || []).push({

          google_ad_client: "ca-pub-xx20303xxxxxxxx",

          enable_page_level_ads: false

     });

</script>
Then you need to create an ad of your choice. It could be a 336×280, 160×600 or responsive ad. You can also set “page_level_ads” to true if you want them appear very frequently inside your post. The Adsense ad code will look something like this.
<script async src="https://pagead2.googlesyndication.com/pagead/js/adsbygoogle.js"></script>

<!-- Responsive_MTF_LinkAds_Windows -->

<ins class="adsbygoogle"

     style="display:block"

     data-ad-client="ca-pub-xxxxxxxxxx"

     data-ad-slot="xxxx5542"

     data-ad-format="link"

     data-full-width-responsive="true"></ins>

<script>

(adsbygoogle = window.adsbygoogle || []).push({});

</script>
How to get Ads displayed inside your post content on your website?
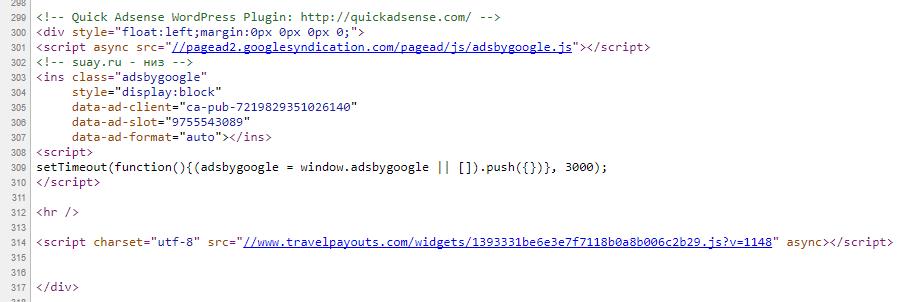
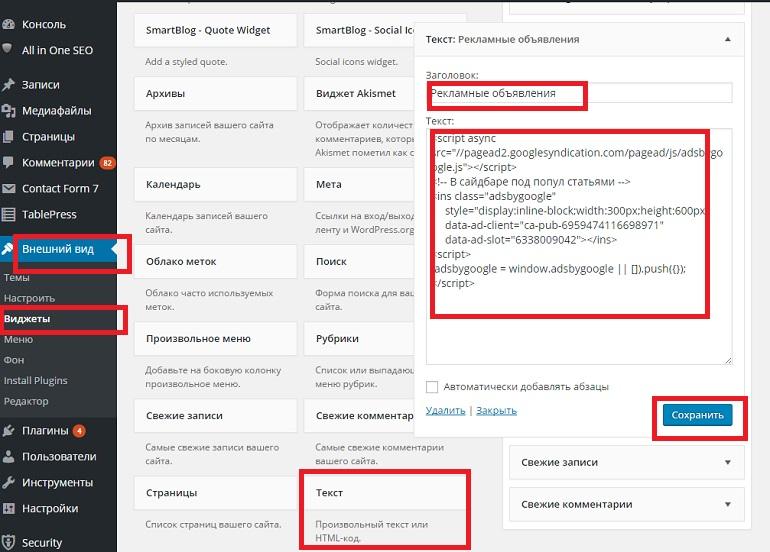
This is a typical case, which depends upon the type of platform you are using. There are various CMS like WordPress, Blogger, Medium, Drupal, Joomla etc. If it’s WordPress, then you can use a plugin called “Quick Adsense” which can be found in the plugin repository.
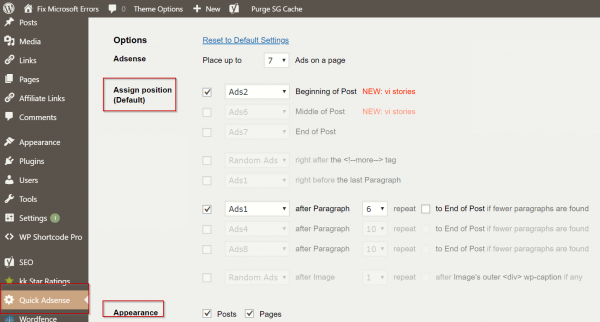
Once installed, you need to make a few changes to the settings. The most important thing is to decide on how many ads you want to display on your post. Then there are 10 text boxes for Ads on Post body and sidebar widget.
You need to take the ad code from your Adsense account (as mentioned before) and paste them here.
Small Trick: If you are including more than 1 Adsense ad in your website page, then you can speed up page loading time, by including the first script in the “header” code and removing it from every Adsense ad code inserted. This script –
is common to all adsense ad codes. So you can insert once in the header or footer code and save some script loading time.
There are various options for your ad to be displayed inside the body of the content. You can assign position after paragraph, beginning of post, end of post, after image etc. You can also decide to make them appear on pages or not.
Solutions for the “No slot size for availableWidth=0” error
Identify the ad
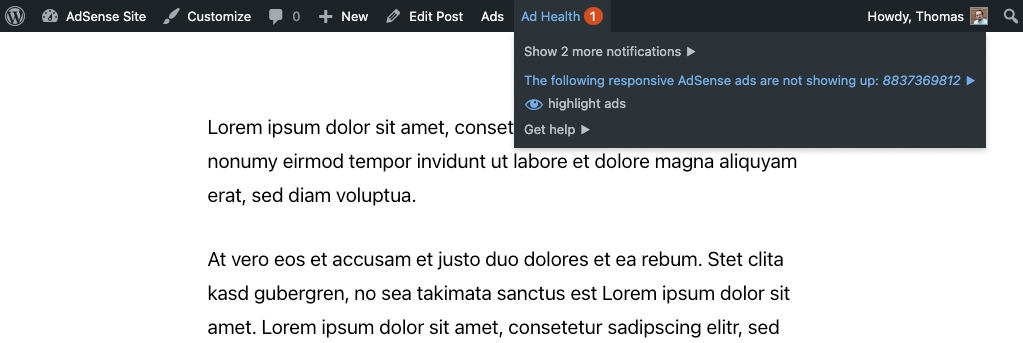
In a first step to show your responsive ads and resolve “adsbygoogle.push() error: No slot size for availableWidth=0”, you need to identify which ad is affected by this.
This is usually the case for any responsive ad that is not visible. It might not even leave a visible space.
Advanced Ads offers help when you are logged in to your site and have the WordPress Toolbar enabled.
When Advanced Ads detects an empty responsive AdSense ad, it will show a warning under “Ad Health.” A click on that warning will lead you to the ad edit page.
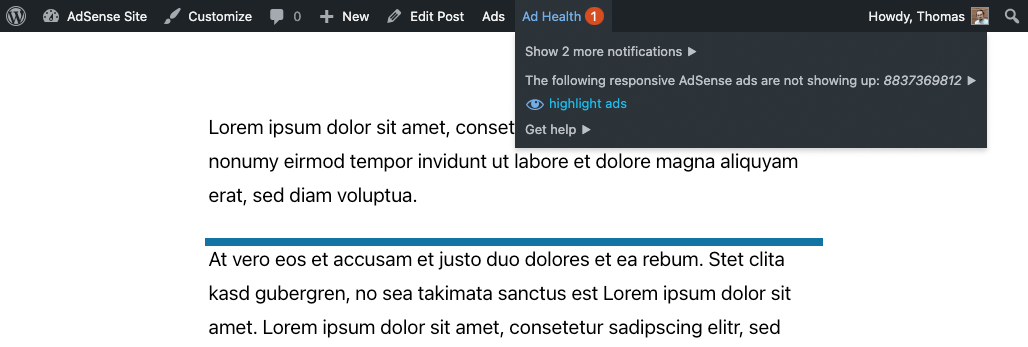
You can also use the “highlight ads” option, and Advanced Ads will add a border around the ad space.
As you can see below, the container with the collapsed AdSense ad is now highlighted with a border.
Remove the position option
A common reason for responsive ads not showing up is using the Position option to place the ad next to another element, like a text block.
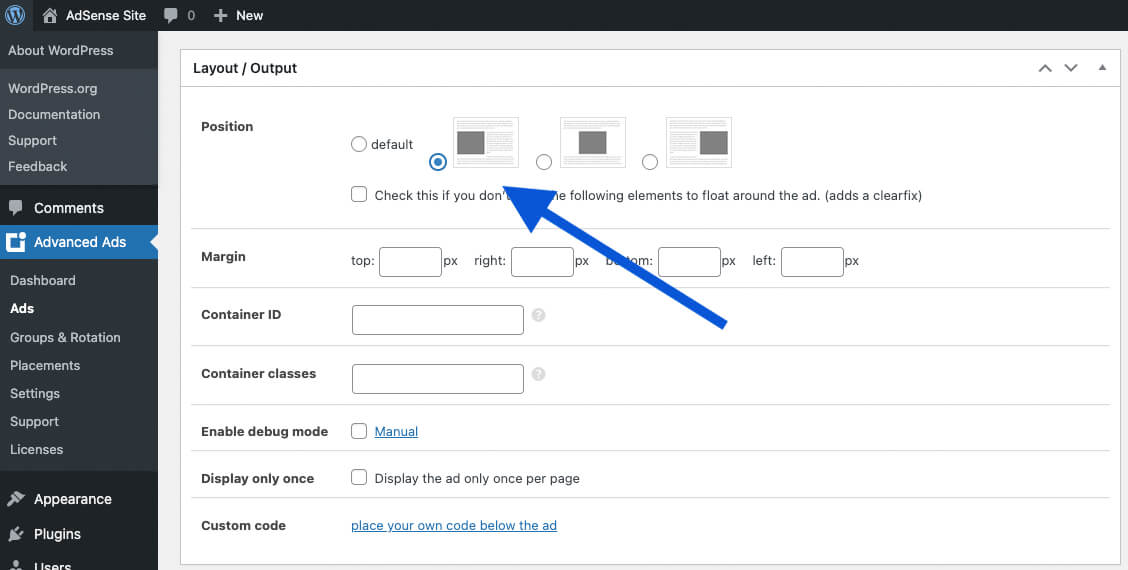
Advanced Ads ignores the Position option for responsive AdSense ads to prevent our users from running into the issue. Still, you might want to remove it to make sure.
There is also a Position option on the placement level. Go to Advanced Ads > Placements, identify the placement that delivers your ad, and click on “show all options.” Now set the Position option to “default.”

If “No slot size for availableWidth=0” was caused by Advanced Ads, then the issue should be resolved. The following steps can help you if the cause lies in another script.
Change the ad position
Try another position for this ad. Advanced Ads has many ad placements that allow you to do that without changing any code.
Try fixed-sized ads
As mentioned, most AdSense ads are nowadays responsive. That is a good thing. However, technical limitations or specific positions sometimes require us to use fixed-sized banners.
If you need to place a specific AdSense ad in a position with an unspecified width, like next to a floating text, then a fixed-size ad is the only solution.
Take a look at or just switch the Type option of the AdSense ad within Advanced Ads to “Normal” and then define a specific size.
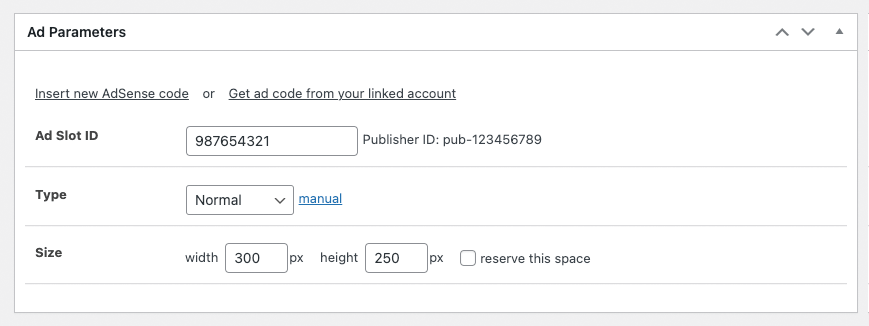
You could even set up the same AdSense ad to use fixed sizes depending on the available width. This gives them a responsive touch without conflicting with floating containers.


All AdSense ads stay empty
The solutions above assume that you have a fully working AdSense account with at least some of the ads showing up.
See our Ads not showing up page to find general and AdSense-specific solutions to this problem.
So What’s The Plan?
Here’s what needs to be done in order to install Google Adsense with Google Tag Manager:
- First, we need to take the initial Adsense ad unit code (that Adsense gives to publishers) and split it into two parts. Once must be added to the website’s code (directly) and the second one should be implemented via GTM (at least that’s the way how I do it). If you want to go next level and inject the full Adsense code via GTM, read this guide by Simo (and that is much more advanced technique).
- Even if the part of the ad unit code is added to the website, it won’t display any ads unless GTM fires the actual script. In fact, you won’t see anything at all. There will be nothing visible instead of that ad, no placeholder or empty space.
- We’ll configure the script in the GTM to respect user’s privacy preferences:
- If a user agrees to functional and marketing cookies, Adsense will serve personalized ads.
- If a user agrees only to functional cookies, Adsense will serve non-personalized ads. Even though non-personalized ads don’t use cookies or mobile ad identifiers for ad targeting, they still use cookies or mobile ad identifiers for frequency capping, aggregated ad reporting and to combat fraud and abuse. Therefore, you must obtain consent. I interpret that this type of consent falls under the “functional cookies” definition.
- If a user does not agree to any cookies at all, Adsense script will not be loaded at all, therefore no ads will be visible.
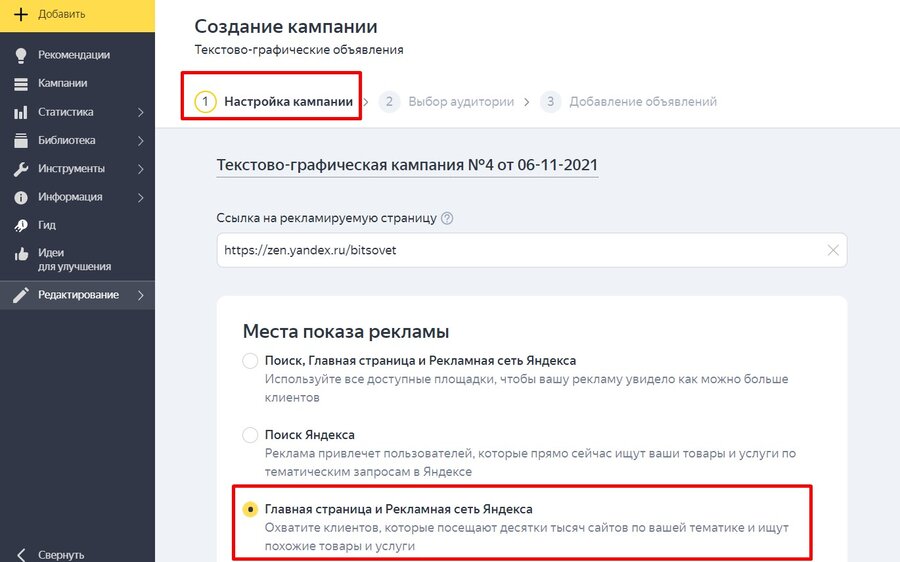
Как настроить показ РСЯ рекламы на сайте?
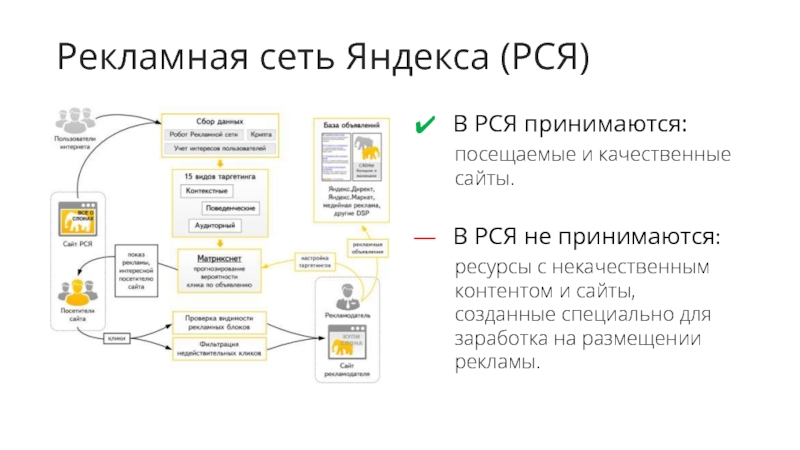
Сайт может присоединиться к рекламной сети Яндекса, если он отвечает определённым требованием.
Среди них:
- материалы сайта должны быть полезны для людей и иметь тематику, не запрещенную пправилам участия в РСЯ;
- сайт должен располагаться на платном хостинге;
- количество уникальных посетителей должно быть больше 500 человек в сутки (для этого необходимо предоставить доступ к счётчику, при помощи которого на сайте отслеживается посещаемость).
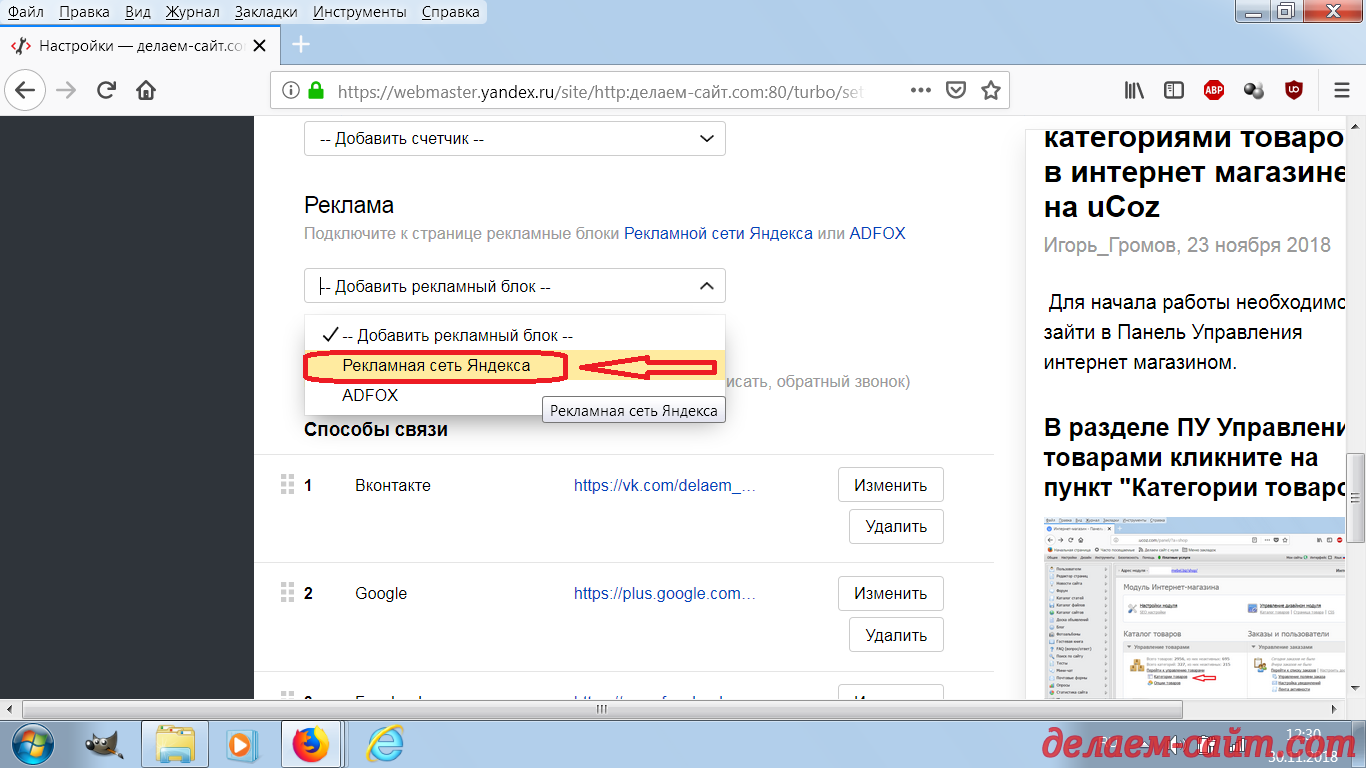
Регистрация в рекламной сети Яндекса начинается с нажатия на кнопку «Присоединиться» и заполнения анкеты для будущих партнёров. Заявка на участие будет проходить модерацию около недели. Если её одобрят, то вам придёт письмо с положительным ответом на почту.

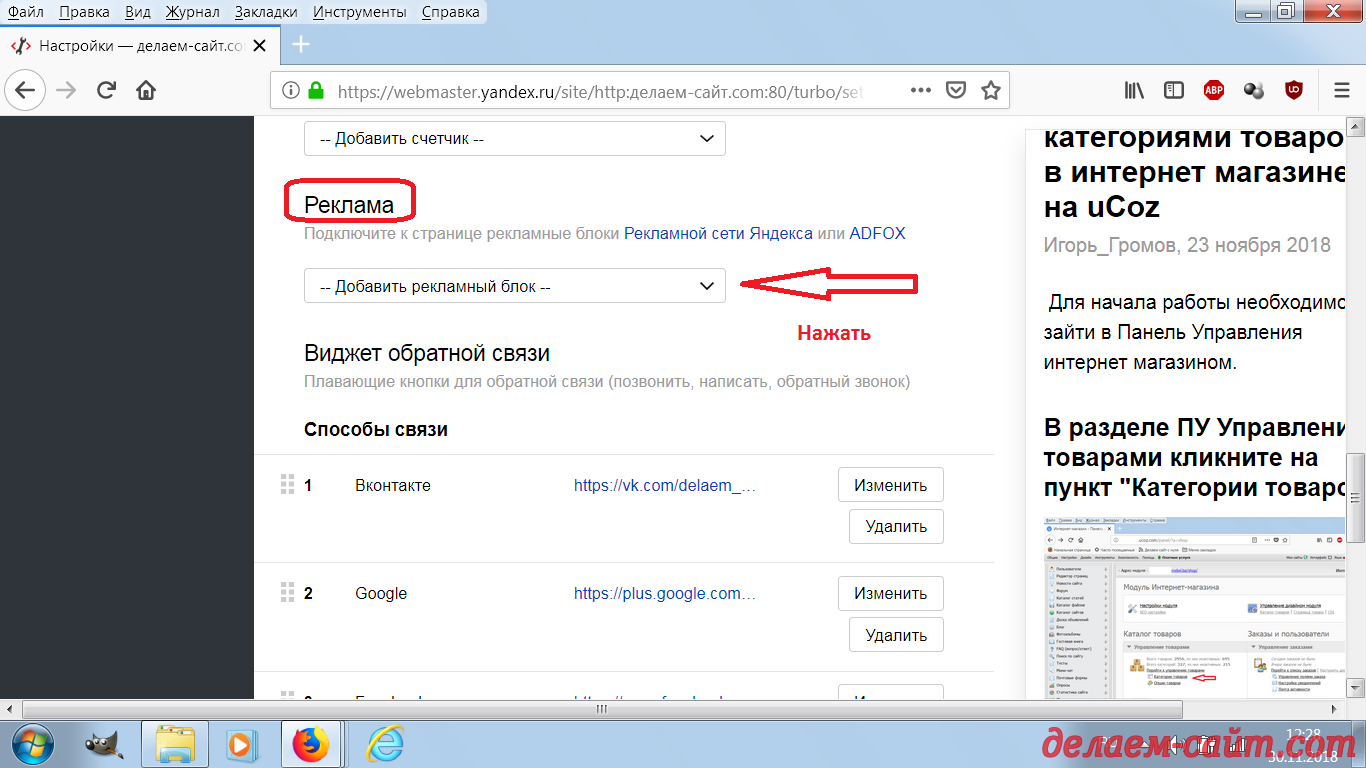
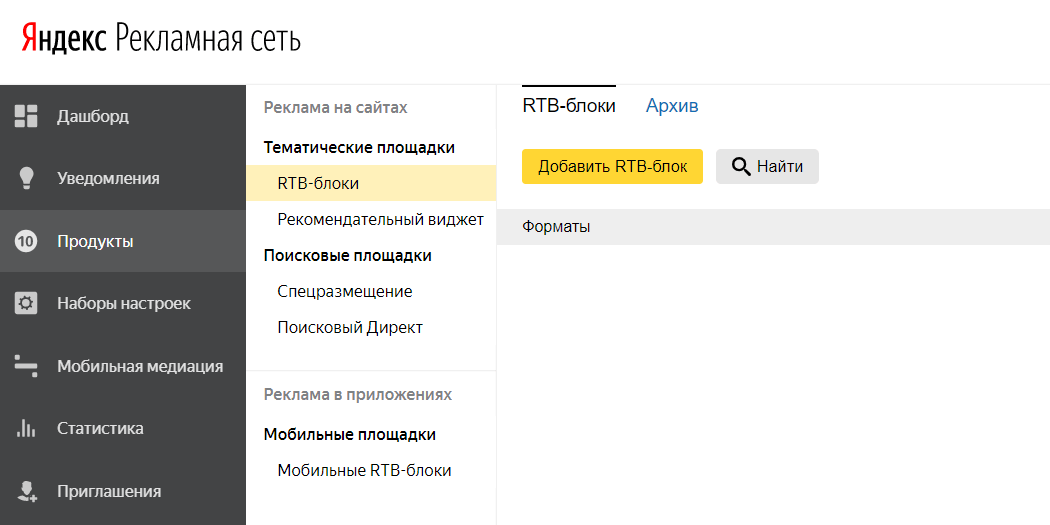
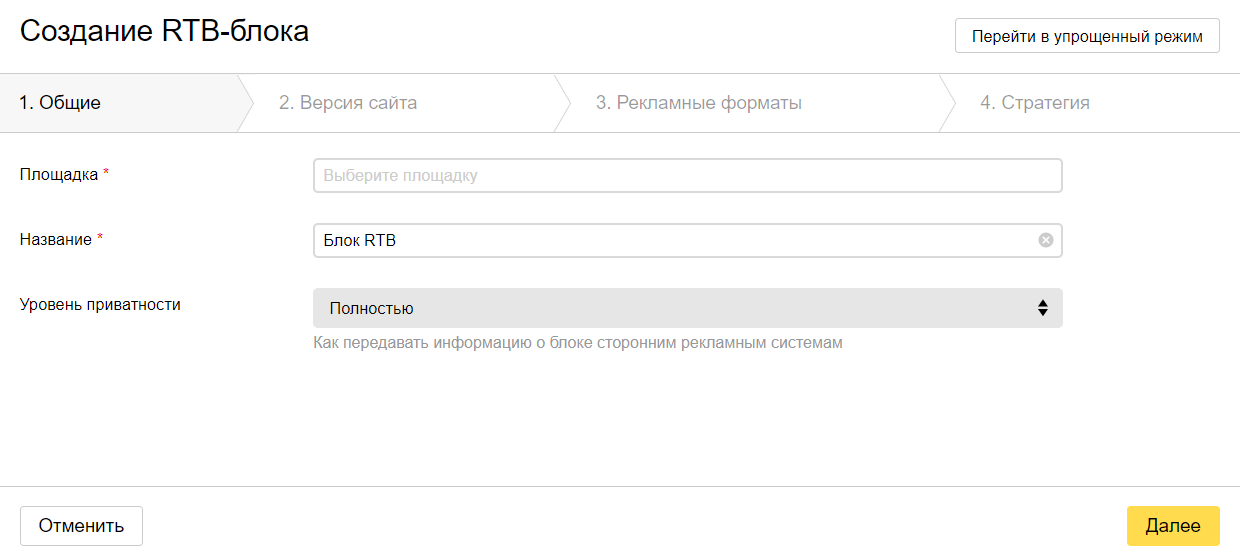
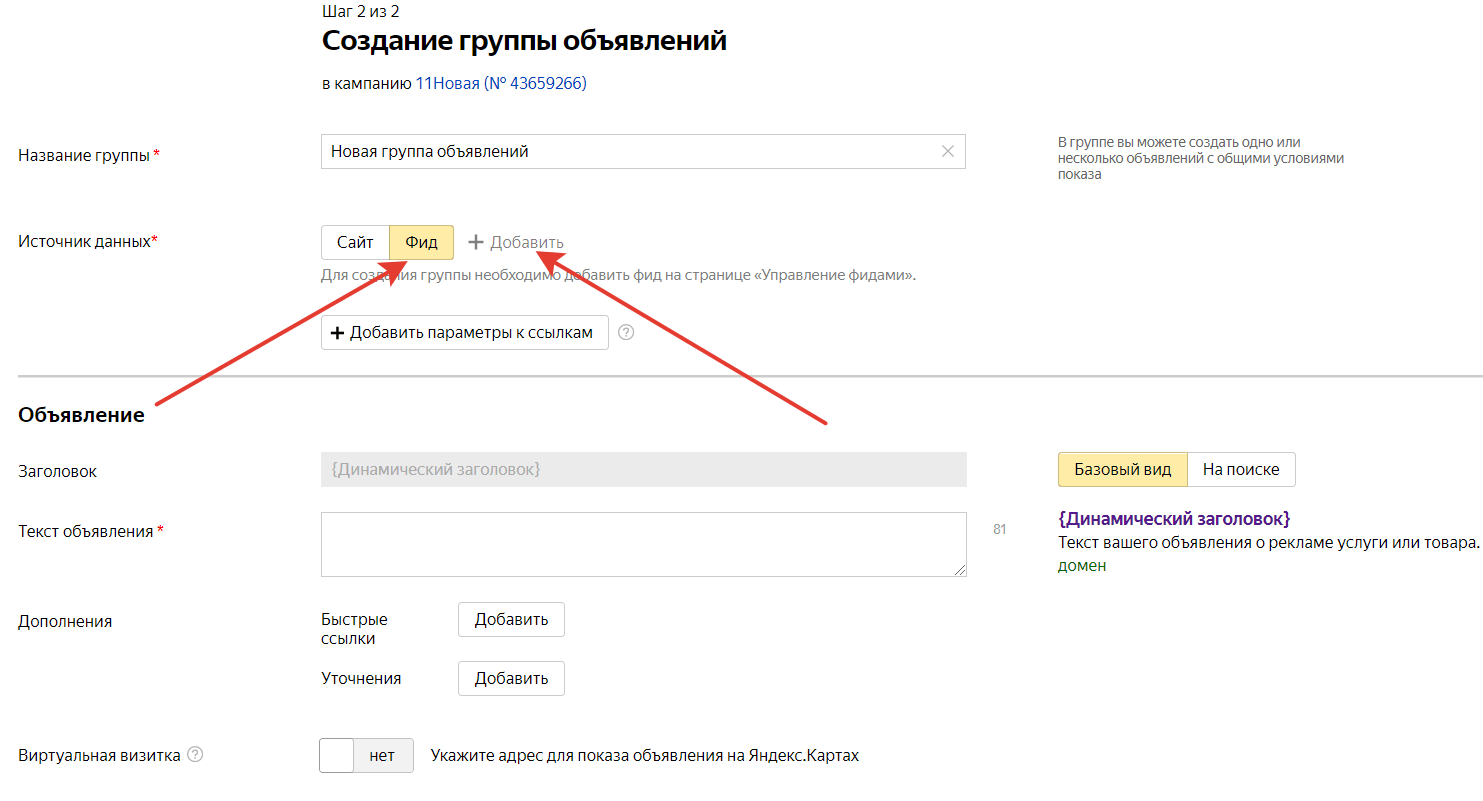
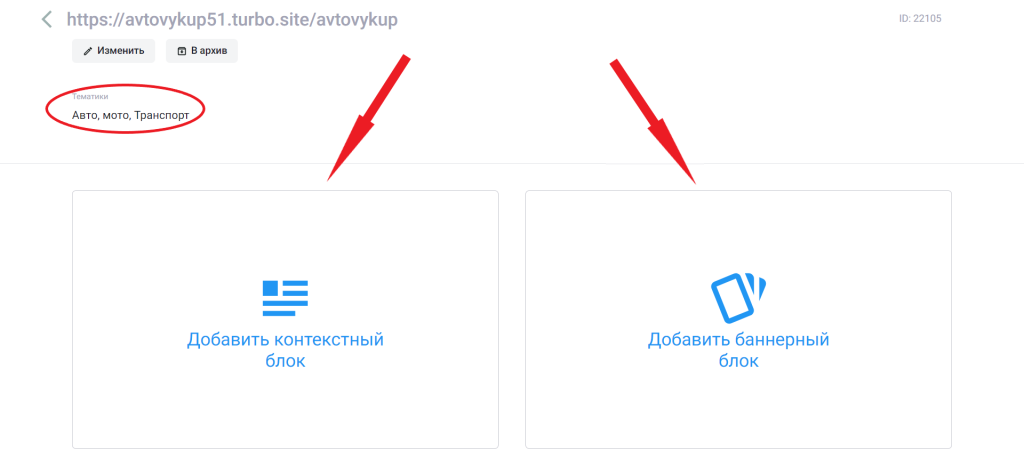
После этого можно переходить к созданию рекламных блоков в личном кабинете. Осуществляется это посредством кнопки «Добавить RTB-блок».

В открывшемся диалоговом окне на вкладке «Общие» вам нужно выбрать тематическую площадку, уровень приватности, версию сайта и ввести название блока.

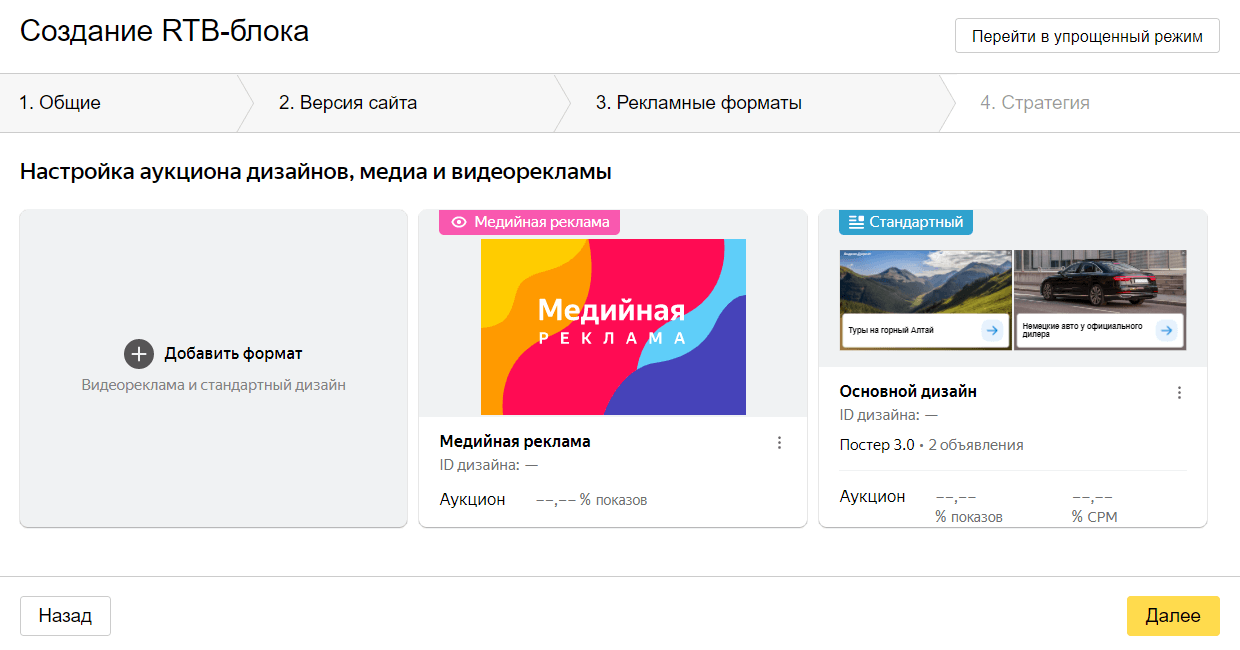
На следующей вкладке добавить форматы, которые желаете показывать в этом блоке.

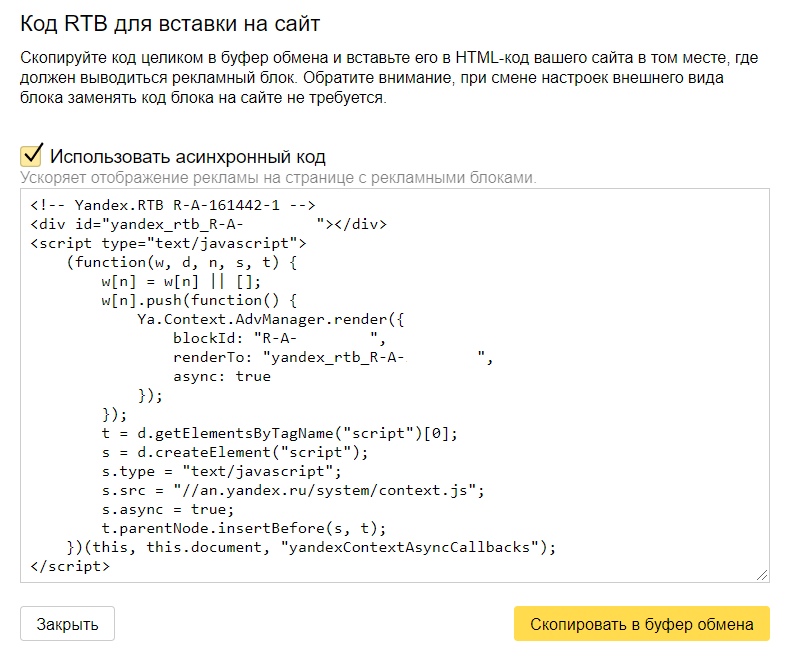
После завершения настройки необходимо скопировать код и вставить его то место HTML разметки, в котором хотите отображать это объявление.

Решение проблемы: не показывается рекламный блок Adsense через плагин WordPress Quick Adsense
По умолчанию в настройках форм для вставки рекламных блоков атрибут alignment установлен на значение «Слева»:
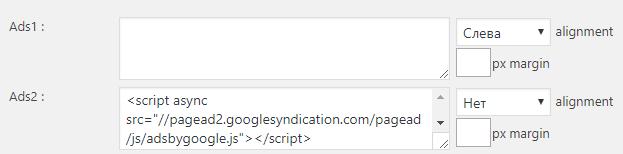
В результате на сайте рекламный блок получается обёрнутым в:
<div style="float:left;margin:0px 0px 0px 0;">

</div>
Если убрать выравнивание (установить alignment на «Нет»), то это решает проблему и рекламные блоки снова начинают показываться.
Если вы используете подобные плагины (Angular и т.д.) – попробуйте аналогичные действия.
Связанные статьи:
- Объявление «Поисковая система»: почему ничего не найдено и почему не показывает рекламу (100%)
- Как убрать предупреждение «Не рискуйте своими доходами: чтобы избежать их снижения, исправьте проблемы с файлом ads.txt» (85.1%)
- Что выгоднее, иностранный трафик с AdSense или российский трафик с AdSense + РСЯ? (78.1%)
- Выгоднее ли нативные блоки рекламы AdSense обычных? (78.1%)
- Какой доход даёт «рекомендуемый контент» AdSense? (78.1%)
- Как для посетителей с блокировщиком рекламы не показывать форму комментирования и картинки в WordPress (RANDOM — 67.2%)
Bloc (Business Logic Layer):
It acts as a middle man between UI and Data layer.
- Bloc takes an event triggered by the user (ex: GetWeatherData button press, Submit form button press, etc) as an input, and responds back to the UI with the relevant state.
- The business logic layer’s responsibility is to respond to input from the presentation layer with new states.
- This layer can depend on one or more repositories to retrieve data needed to build up the application state.
- The business logic layer is notified of events/actions from the presentation layer and then communicates with the repository in order to build a new state for the presentation layer to consume.
Asynchronous AdSense code
This code will load Google ads asynchronously while loading your web page in browser.
I think you can understand Google totally changed the AdSense code after 2019. I prefer that you must replace your old code with new Google AdSense code.
If you website load Google AdSense asynchronous code then you will see little bit improvement in your website speed.
Actually I can’t say above method but i have to give some
guidance. I some case JavaScript method will not work if you were not able to
change directly in code.
You can better understand and will be prepare for the
further implementation of following JavaScript method for placing some delay to
load Google ads after page load of your website.
If you are not technical person needs help then surely
contact me I will help you to increase your website page speed by placing
AdSense code at properly in your site.
This method will work just like load Google AdSense
dynamically in your website.
Method 3: Use JavaScript Delay Method
To apply this method for placing delay in Google AdSense code execution you will required to some change in your existing AdSense code.
You will need to remove just script link from all your ads
and place at once before </head> section of the page.
Your AdSense code will look like the following:
After that you need to add the following code at the end of page just before </body>
Function initialize_AdsenseCode will be executed after some delay of 100 millisecond after your page load successfully.
Note: You will need to add the following line in that initialize_AdsenseCode function with multiply by number of ads.
For example if you want to put 2 ads in your page then you
will required to add that line only two times in code.
Most of blogger use Google AdSense and place so many ads in one page it will decrease the Website page speed. I want to know that website speed much important to increase SEO score and Google Search Engine Rank.
If you are using WordPress
plugin for better Google ads placement then might be this tricks
will not work.
In last if your website not eligible for Google AdSense or
not approved by Google yet then you should try following link for making money
from other ads publisher site.
Best
Google Alternative Ad publisher Sites
If you have Google AdSense account but that not verified yet then you can visit my previous article How to Verify Address PIN by Google AdSense?
Some people uses load Google ads with Ajax method but i want to say this will not work for normal AdSense and you will require Google Tag Manager.
If i am wrong then you can suggest your opinion related to this article and we can improve this article and help people who use Google AdSense code for earning money online.
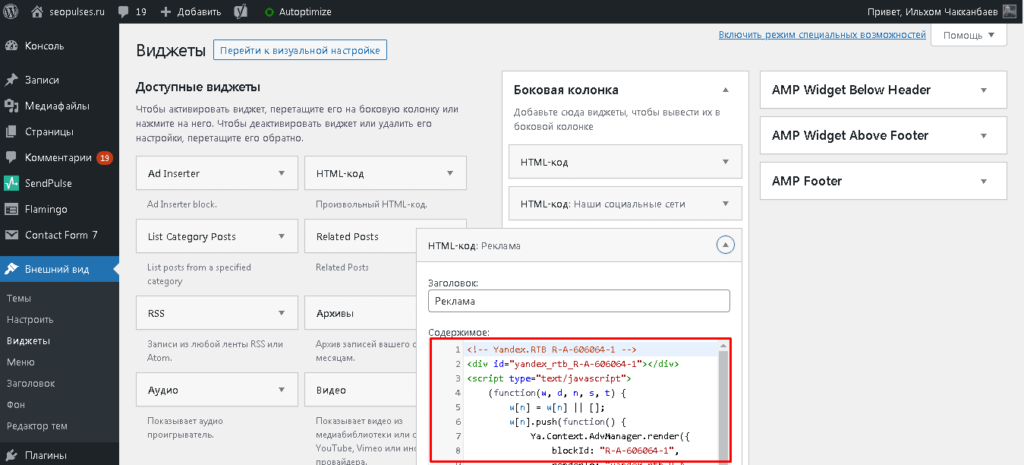
Универсальный рекламный код
Универсальный код вызова рекламы на моем сайте выглядит следующим образом:
<div id="yandex_rtb_R-A-XXXXXX-X"></div>
<script type="text/javascript">
    (function(w, d, n, s, t) {
        w = w || [];
        w.push(function() {
            Ya.Context.AdvManager.render({
                blockId: "R-A-XXXXXX-X",
                renderTo: "yandex_rtb_R-A-XXXXXX-X",
                async: true
            }, function() {
                var g = document.createElement("ins");
                g.className = "adsbygoogle";
                g.style.display = "block";
                g.setAttribute("data-alternate-ad-url", "https://domain.TLD/vasha-reklama.html");
                g.setAttribute("data-ad-client", "ca-pub-YYYYYYYYYY");
                g.setAttribute("data-ad-slot", "ZZZZZZZZZZZ");
                g.setAttribute("data-ad-format", "auto");
                g.setAttribute("data-full-width-responsive", "true");
                document.getElementById("yandex_rtb_R-A-XXXXXX-X").appendChild(g);
                (adsbygoogle = window.adsbygoogle || []).push({});
            });
        });
        t = d.getElementsByTagName("script");
        s = d.createElement("script");
        s.type = "text/javascript";
        s.src = "//an.yandex.ru/system/context.js";
        s.async = true;
        t.parentNode.insertBefore(s, t);
    })(this, this.document, "yandexContextAsyncCallbacks");
</script>
где, — данные вашего рекламного объявления РСЯ, и — данные Adsense, — адрес альтернативного объявления.
Асинхронный код рекламного блока Google Adsense
Здесь я ничего придумывать не буду, а приведу пример кода из справочного раздела официального сайта Google:
<ins class="adsbygoogle"
style="display:block; width:728px; height:90px"
data-ad-client="ca-pub-..."
data-ad-slot="..."></ins>
<script>
( adsbygoogle = window.adsbygoogle || [] ).push( {} );
</script>
И ещё обязательно надо произвести асинхронную загрузку скрипта Google Adsense. На всякий случай, лучше в конце страницы (т.е. после самого последнего рекламного блока в коде страницы):

<script type="text/javascript" src="https://pagead2.googlesyndication.com/pagead/js/adsbygoogle.js" async></script>
Если мне не верите или сомневаетесь (всё же, дело касается ваших денег), вот официальный источник — посмотрите там, заодно прочитайте ответы на часто задаваемые вопросы.
Итак, теперь вы сами можете сделать вызовы всех скриптов своего сайта асинхронными, и страница ваша со всем текстом будет отрисована браузером моментально, а не рисоваться блоками, пугая развалами вёрски.
Выше я показал пример вызова функции отображения виджета ВКонтакте при асинхронной загрузке скрипта с помощью таймера. Но, при использовании современных технологий программирования, можно вызвать любой код без таймера после того, как нужный скрипт будет загружен. Разумеется, даже при асинхронной загрузке. Например, можно использовать для этого функцию фреймворка jQuery. Конечно, в том случае, если вы уже подключили этот фрейморк для создания интересных анимаций и прочих штучек, а специально ради этого подключать лишние 50 килобайт не стоит.
Для разнообразия приведу пример вызова блока комментариев ВКонтакте с асинхронной загрузкой при помощи jQuery.
Paginate
I use jekyll-paginate to generate a paginated listing of all my posts. My index page looks something like this:
I want to show ads on this page, but I don’t want to show an ad for each post.
Since each of my pages contains a maximum of 10 posts, I’m going to show an ad after the second post and another one after the sixth:
Because I’m using the same snippet () in both places, they will always show the same ad. To add a little variety we can create a new ad unit from the Google Adsense console and create a new snippet for it. We can then use a different snippet for each position:
We will now see a different ad on each position.
Split the Adsense Ad Unit Code
After you create an ad unit in Adsense, you’ll get a code which looks similar to this:
<script async src="https://pagead2.googlesyndication.com/pagead/js/adsbygoogle.js"></script>
<!-- Ad unit name -->
<ins class="adsbygoogle"
 style="display:block"
 data-ad-client="ca-pub-xxxxxxxxxxxx"
 data-ad-slot="xxxxxxxxxx"
 data-ad-format="auto"></ins>
<script>
(adsbygoogle = window.adsbygoogle || []).push({});
</script>
What you need to do is to split it into two codes. The first one consists only of scripts:
<script async src="https://pagead2.googlesyndication.com/pagead/js/adsbygoogle.js"></script>
<script>
(adsbygoogle = window.adsbygoogle || []).push({});
</script>
Also, let’s add an additional line of code which will instruct the Adsense script to display personalized ads (or not).
<script async src="https://pagead2.googlesyndication.com/pagead/js/adsbygoogle.js"></script>
<script>
 (adsbygoogle = window.adsbygoogle || []).requestNonPersonalizedAds =1;
 (adsbygoogle = window.adsbygoogle || []).push({});
</script>
And the second one should consist of everything between the <ins> and </ins> tags.
<ins class="adsbygoogle"
 style="display:block"
 data-ad-client="ca-pub-xxxxxxxxxxxx"
 data-ad-slot="xxxxxxxxxx"
 data-ad-format="auto"></ins>
Now, we’ll implement the first code via GTM and you should add the second one directly into the website’s source code.
If you have, say, 5 ad units, you should prepare 5 <ins> codes. They are all different because they contain different information, like ad slot id. As for the <script> codes, all of them are the same on all ad units, therefore we will implement only one code in GTM (which will serve all the ad units).
P.S. I haven’t tested this solution on websites with infinite scroll or websites which dynamically load ad units after browsing for a while so keep that in mind. This solution works properly with regular smaller websites which load all ad units at once.
Итоги
Что мы получили на примере моего сайта? Если ставки на аукционе РСЯ выше указанного порога 33 рубля за 1000 показов, то происходит показ баннеров из RTB Яндекса. Если дорого объявления не нашлось, то показываются объявления Adsense, которые приносят наибольшую прибыль. Если таковых тоже нет, то показывается альтернативная реклама.
Кнопки «Бабло» не существует. Но это решение увеличивает шансы на более высокий доход. На моем сайте сумарный доход от двух рекламных сетей увеличился незначительно, примерно на 10%, по сравнению с другой схемой показа рекламных объявлений в зависимости от источника перехода. О которой я писал ранее.
Следует периодически просматривать стоимость 1000 показов в Google Adsense и опираясь на ее величину корректировать порог минимального CPM в Яндекс РСЯ.